How to Make a 3D Beaded Mini Acorn: Free Beading Pattern
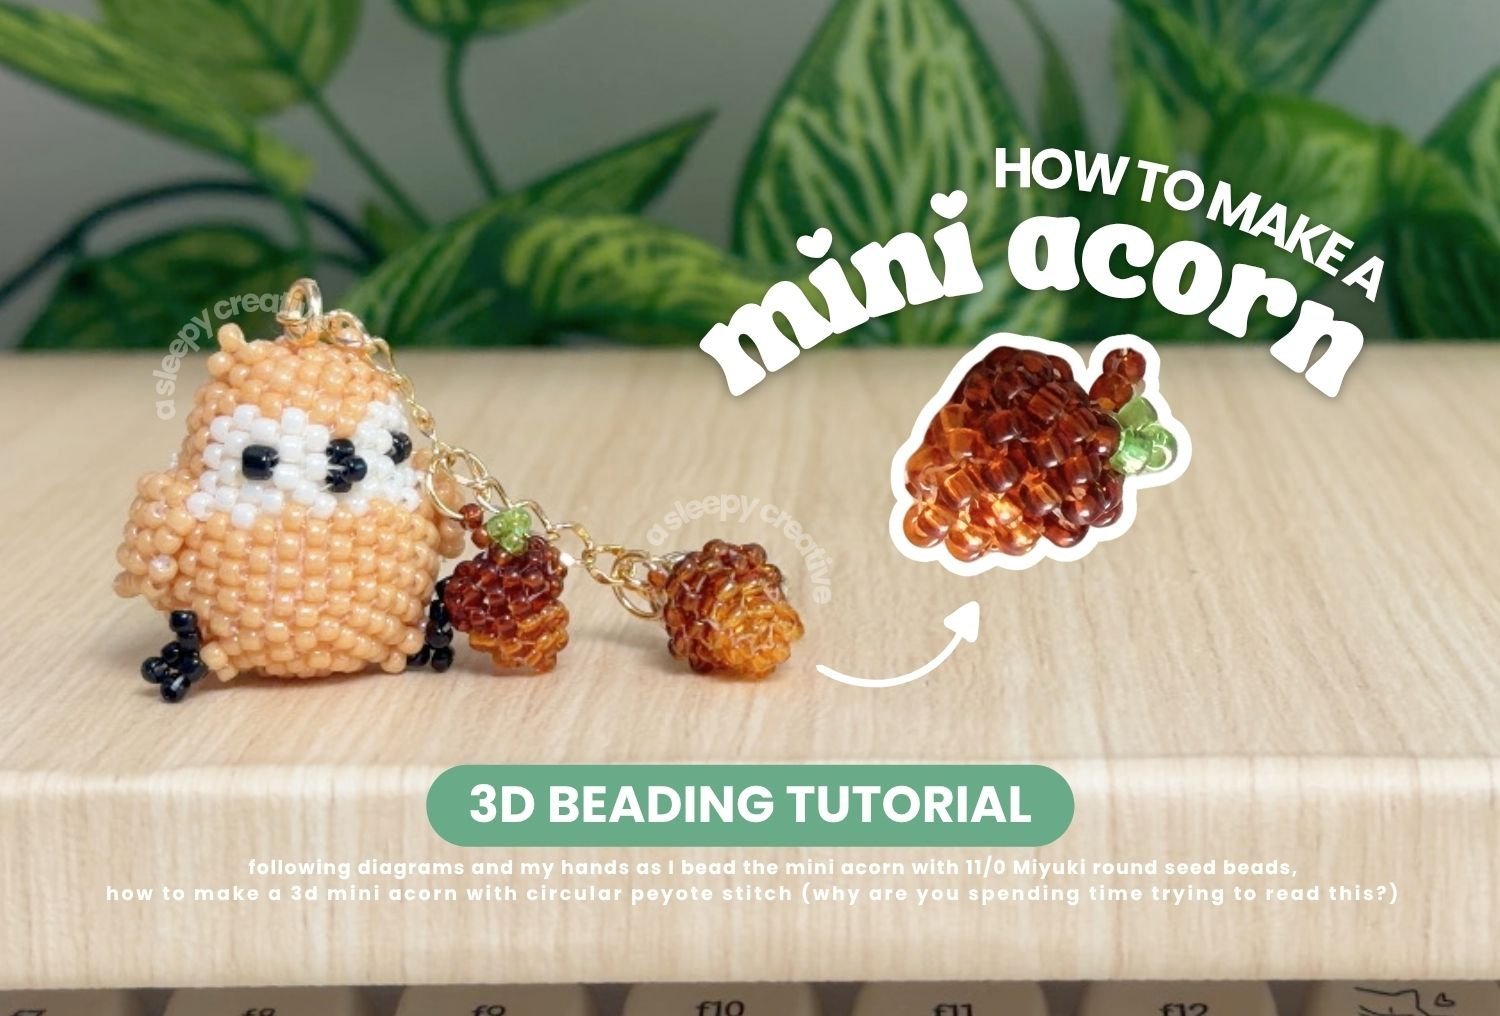
Autumn is the perfect excuse for a tiny beaded acorn! I made several tiny crafts early September and thought of offering them as a bundle for mini accessories to go birth the larger crafts, but I thought I didn’t have enough of them to make a proper listing.
So for now, I’ll offer this one for free! Later on, I’ll have a bundle of mini accessories with all the mini accessories I’ve made that you can follow easily.
Anyway – this 3D mini acorn is a quick, beginner-friendly project in circular peyote stitch: only 11 rows, three colors and no stuffing needed. It makes a cute mini keychain (especially if you make a couple of them!), phone charm or little fall decoration. I personally like to add it to the larger crafts like the owl as a keychain with gold hardware – I think it looks super cute!
If you are new to peyote stitch or 3D beading, I recommend reading these first:
- Learn the basics of peyote stitch
- How to read circular peyote stitch patterns
- Learn how to make a simple 3D beaded ball in peyote stitch
Materials needed
You’ll need some materials before starting, which are:
- Fireline 8lb (0.2mm) beading thread & a beading needle
- Beading needle
- Scissors to trim your thread
- 11/0 round seed beads in 3 colors: dark brown (cap), light brown (nut) and green (stem). I tried both Miyuki round and Toho round, and both worked fine.
- No stuffing needed! If you prefer, you can add a small bead or something similar inside before closing the acorn.
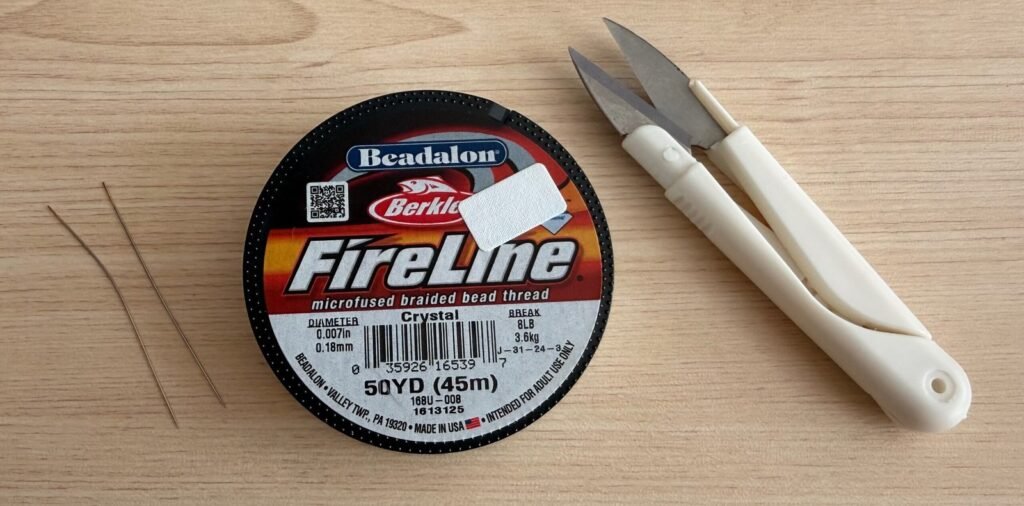
For the beads, I used Miyuki 11/0 for mine in transparent finish (brown and dark brown) for the example shown in the video. Toho comes out slightly larger.
Want to bead along in real time? Watch the full 20-minute tutorial on my YouTube channel.
3D Mini Acorn Pattern – Cap (Rows 1 to 6)
We start with the cap in dark brown. Each diagram shows the beads added during that row.
Row 1
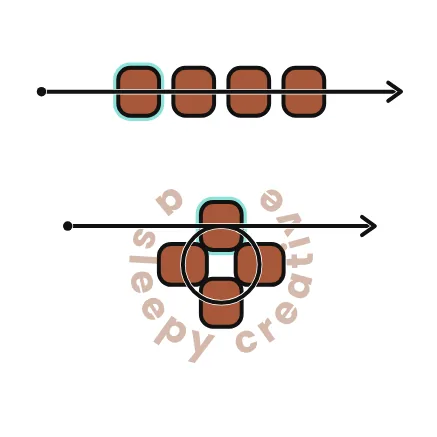
Row 1
4 beads • 1-1-1-1
String 4 dark brown beads and pass through the first bead again to form a ring. Slide the ring along to leave a 6″ (15 cm) tail, then pull tight.
Row 2
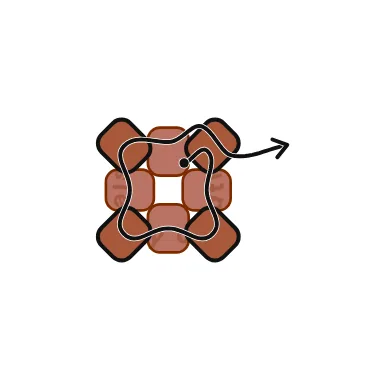
Row 2
4 beads • 1-1-1-1
Regular round: add 1 bead in each gap. A gap is the space between two beads of the previous row.
Row 3
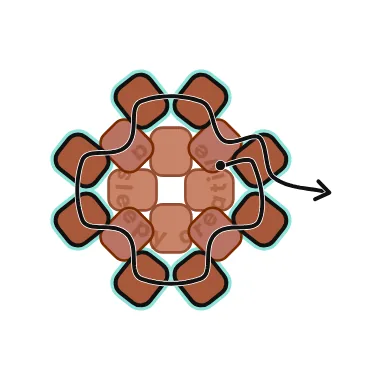
Row 3
8 beads • 2-2-2-2
Increase: add 2 beads in each gap.
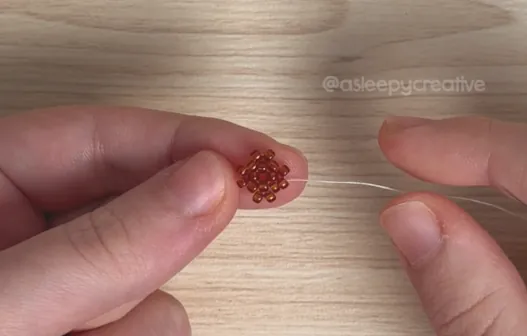
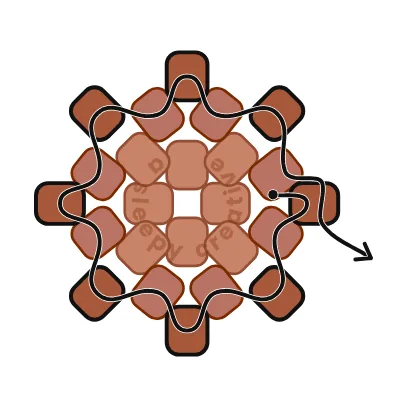
Row 4
Row 4
8 beads • 1-1-1-1-1-1-1-1
Regular round: add 1 bead in each gap.
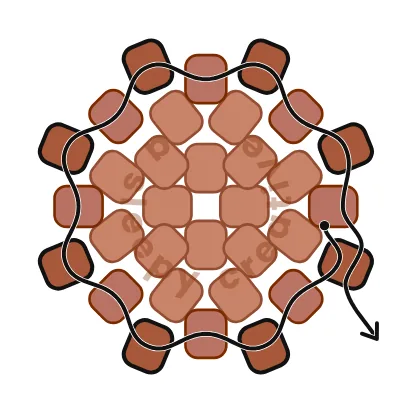
Row 5
Row 5
8 beads • 1-1-1-1-1-1-1-1
Regular round: add 1 bead in each gap.
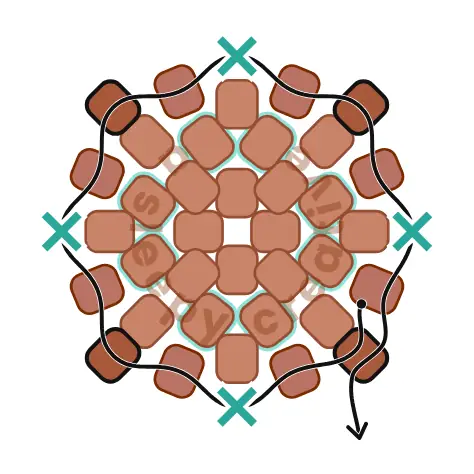
Row 6
Row 6
4 beads • 1-0-1-0-1-0-1-0
Decrease: skip gaps 2, 4, 6 and 8, and add 1 bead in the other gaps. This closes the cap.
Pull tight on your thread before continuing with the nut of our lil acorn.
3D Mini Acorn Pattern – Nut (Rows 7 to 11)
Now we switch to light brown for the body of the acorn.
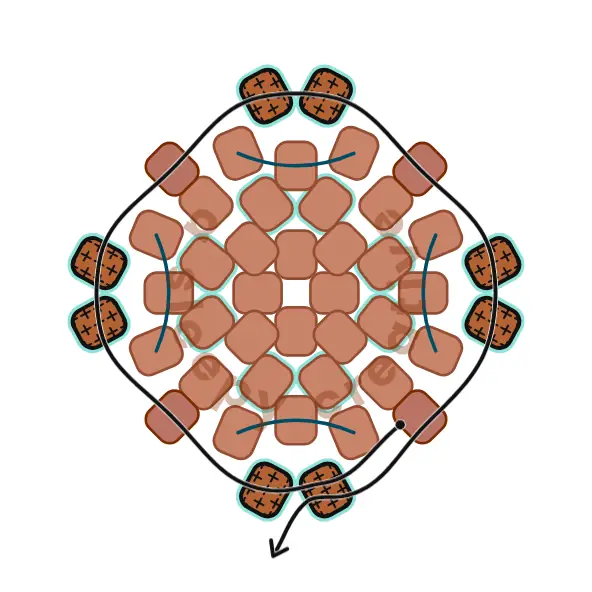
Row 7
Row 7
8 beads • 2-2-2-2
Switch to light brown here. Increase: add 2 beads in each gap.
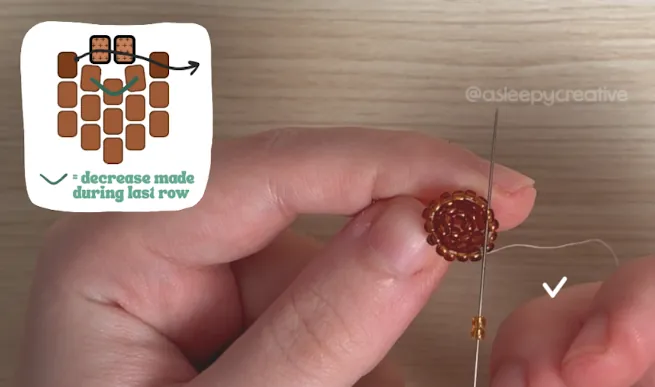
Make sure you pull tight on your thread!
Row 8
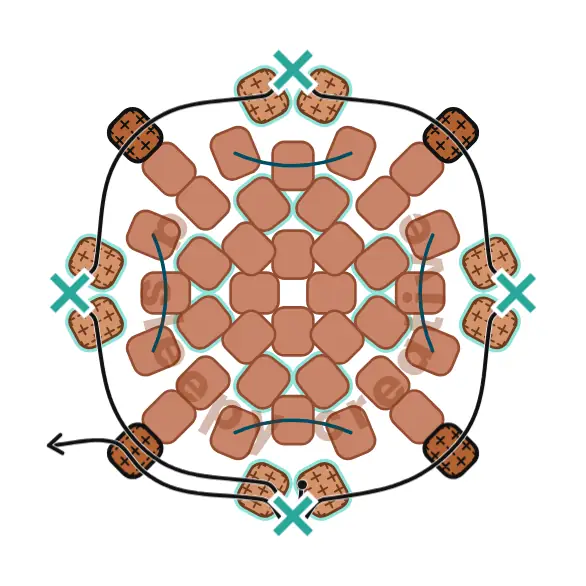
Row 8
4 beads • 0-1-0-1-0-1-0-1
Decrease: skip gaps 1, 3, 5 and 7, and add 1 bead in the other gaps.
Row 9
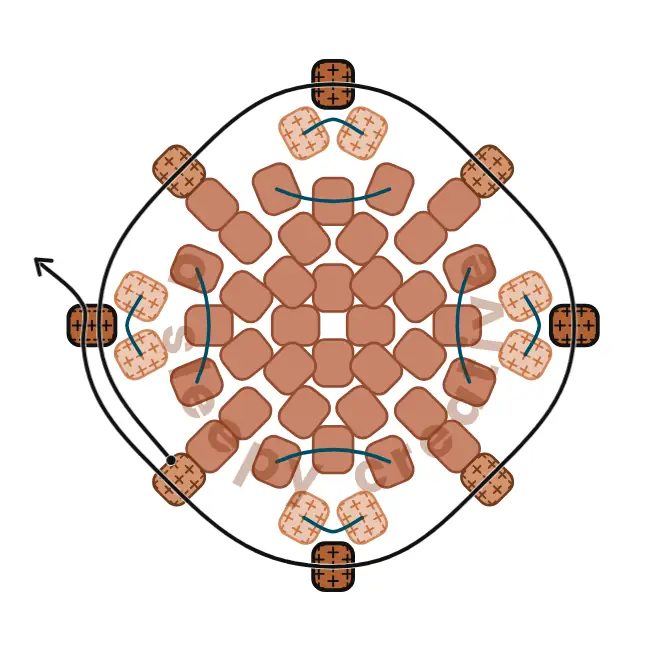
Row 9
4 beads • 1-1-1-1
Regular round: add 1 bead in each gap.
Row 10
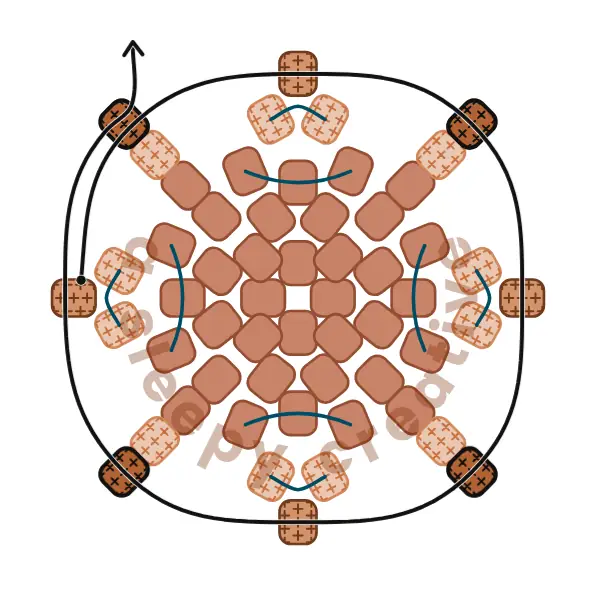
Row 10
4 beads • 1-1-1-1
Regular round: add 1 bead in each gap.
Row 11
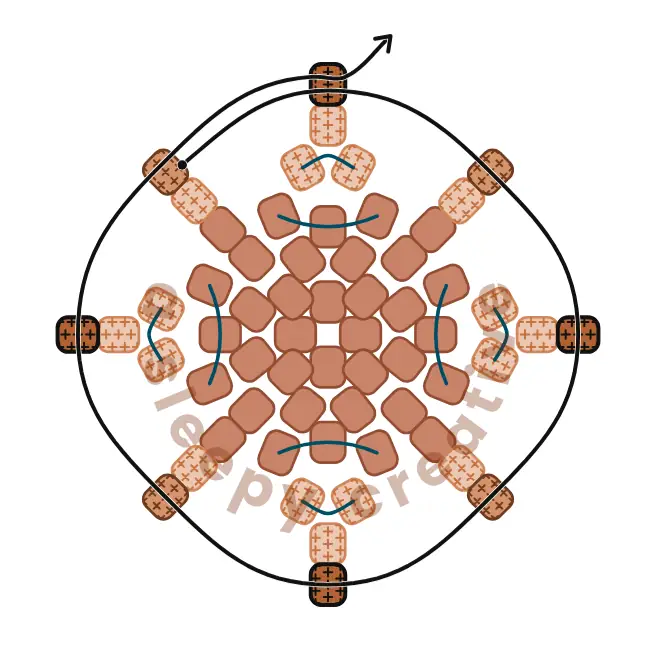
Row 11
4 beads • 1-1-1-1
Regular round: add 1 bead in each gap. These are the last four beads of the acorn.
Once you’re done, pass your thread once more through the last 4 beads added and pull tight!
3D Mini Acorn Pattern – Finishing
Now we’re adding a couple of details to really bring everything together. These steps are optional, but in my opinion, they make the acorn much better!:)
Step 1
This step follows the last row you’ve just added!

From the last bead added, add one additional bead and go through the bead facing that one from the opposite side. You can pass through thread multiple times to secure your thread.
Then, reposition it by going through the beads until you read the top of your acorn – back to the cap! We’re gonna add a little stem and leaf.
Step 2
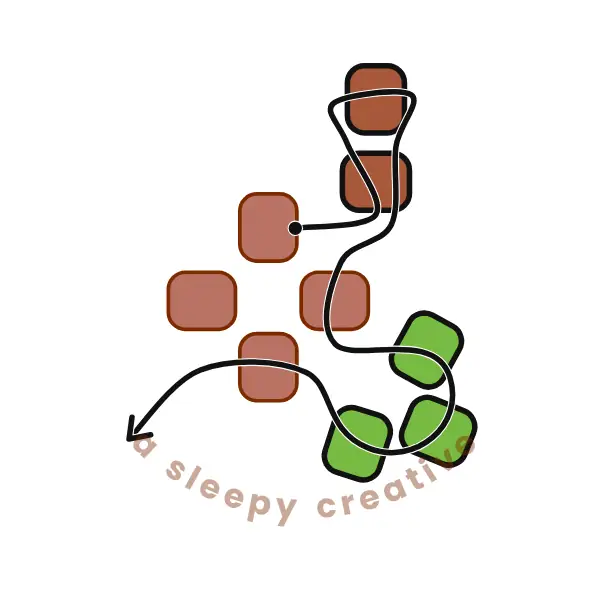
Position your thread at one of the beads of row 1. Add two brown beads (dark brown), then go through the first dark brown added. Pull tight, making sure these two newly added beads stay close to the base.
Go through the next bead of the 4 foundation beads, then add 3 green beads before going through the third brown bead of the foundation row.
Again, pull tight on your thread and join both your ends. Tie a knot, then weave both ends of your thread through multiple beads, in multiple directions before trimming both ends!
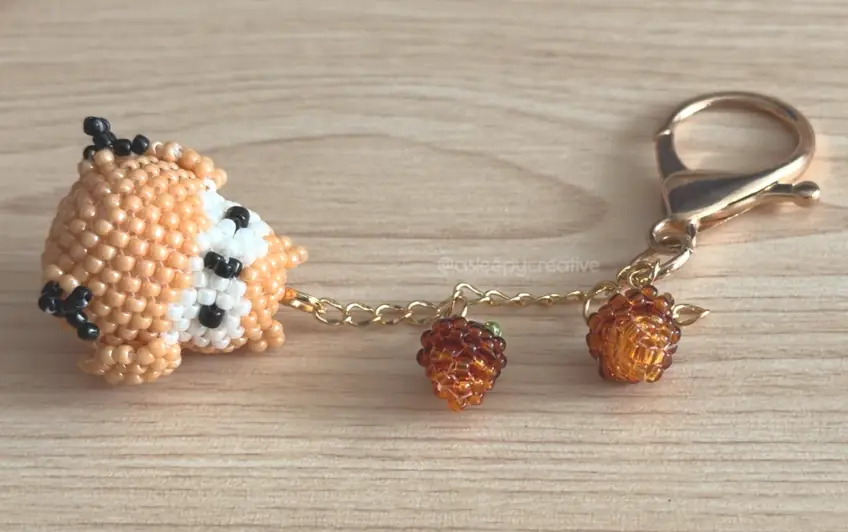
And we’re done with our little acorn! You can turn it into a little charm for your keychain, a phone charm or a cozy fall decoration. ♥