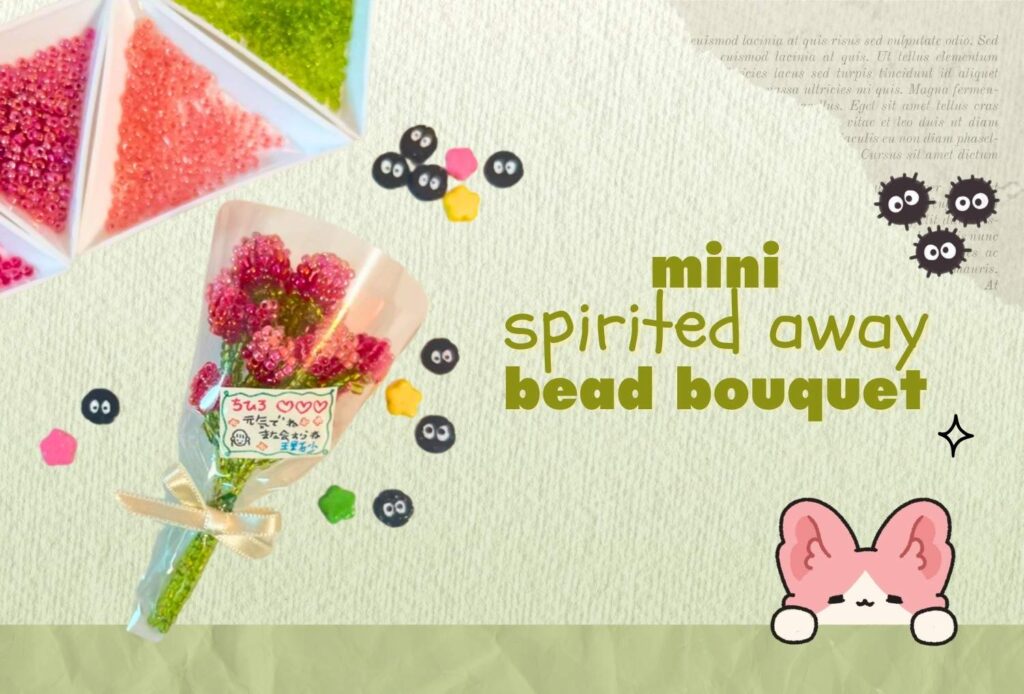
There’s something truly magical about creating miniature worlds with your own hands, and this Spirited Away-inspired bead flower bouquet captures that enchanting spirit perfectly. I’m a huge Studio Ghibli fan, so of course I had to try making something around that! One of my favorites is Spirited Away; so this is the topic of today’s craft!
This tutorial will guide you through creating an intricate bouquet made entirely from seed beads and copper wire. The finished piece isn’t just a craft project – it’s a tiny work of art (if i say so myself) that can be displayed in a mini bottle, given as a meaningful gift, or kept as a charming decoration that brings a touch of whimsy to any space. (personally, i’m displaying one on my desk!)
While this project requires patience and attention to detail, the techniques are straightforward and perfect for both beginners and experienced crafters. The key is taking your time and enjoying the meditative process of working with these tiny, colorful beads. Each flower you create builds toward something truly special, and the sense of accomplishment when you see your final bouquet come together is absolutely magical.
Fair warning: this is a substantial project that will span multiple crafting sessions, but that’s part of its charm. You can work on it bit by bit, making it perfect for those cozy crafting evenings when you want to create something beautiful while relaxing.
Let’s dive into this enchanting world of miniature flower making!
The Plan
Before we dive into the crafting process, let me walk you through exactly what we’ll be creating together so you know what to expect at each stage.
What We’re Making
We’ll be creating a miniature Spirited Away-inspired bouquet with multiple flower sizes that comes together in an adorable wrapped presentation, complete with a tiny handwritten card.
Step-by-Step Overview
Here’s the complete journey we’ll take:
Phase 1: Individual Flowers
- Make approximately 18 individual flowers total: mix of large and small flowers (I personally made 16 I think, so it depends on the look you want to achieve!)
- Each flower gets its own stem with leaves and green beading
Phase 2: Creating Mini Bouquets
- Combine around 6 individual flowers into smaller bouquets (3 large + 3 small per bouquet, or the balance that seems right for you)
- Repeat this process 3 times to create 3 mini bouquets total – you can also stick to two mini bouquets, and your final bouquet will be less full but still cute!
Phase 3: Final Assembly
- Merge the 3 mini bouquets into the final bouquet
- Use wire to secure the mini bouquets together
Phase 4: Presentation
- Wrap the bouquet in cellophane
- Create and attach a mini bow
- Make a tiny card (hand-drawn or printed from template)
- Optional: Display in a mini bottle with decorative elements
Why This Approach Works
Breaking the assembly into phases prevents the stem from becoming too thick to work with and makes the process much more manageable. You’ll have several natural stopping points where you can take breaks or spread the project across multiple crafting sessions.
Time Expectations
- Individual flowers: 10-15 minutes each (×18 flowers)
- Mini bouquet assembly: 15-20 minutes per bouquet (×3 bouquets)
- Final assembly and wrapping: 15 minutes
- Card creation: 10-15 minutes
Total project time: Approximately 5-6 hours
This is definitely a project to spread across multiple crafting sessions!
Now that you know the full roadmap, let’s start crafting!
Material
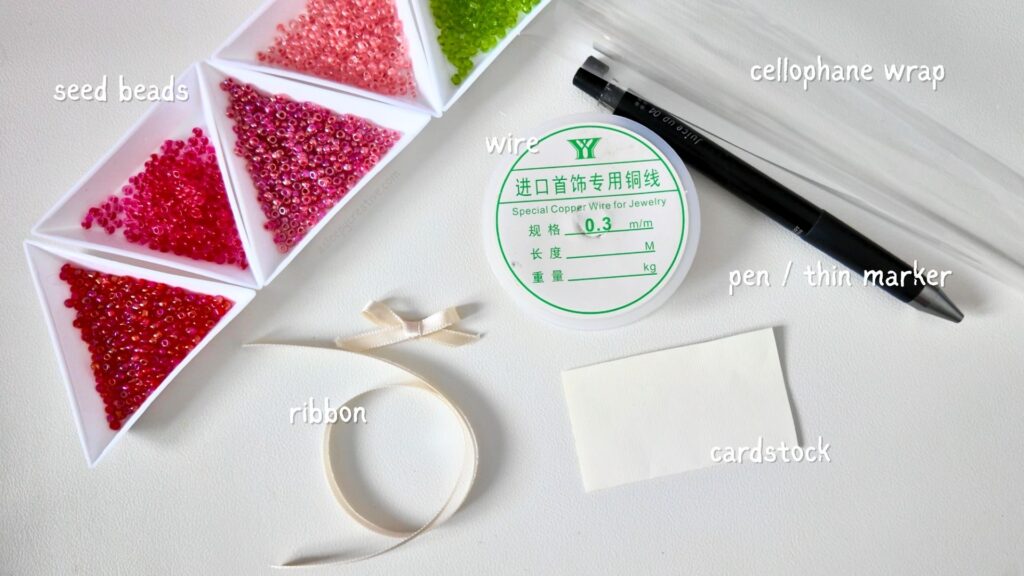
For this project, you’ll need various items that are all very affordable.
- Seed beads 3mm
I’m using 3mm seed beads for this project – but you can definitely use 2mm as well. The final result will just be smaller!
In terms of colors, I’m using four different shades of pink beads. I want to create different gradients on my flowers, and I had a lot of different shades of pink at hand. But you can definitely have great results with 2 shades (or even with one if you don’t have more, but you won’t be able to create a gradient, obviously). Not making a gradient is not a problem, but the result is prettier when you make a gradient, even if it’s just a 2 shades gradient.
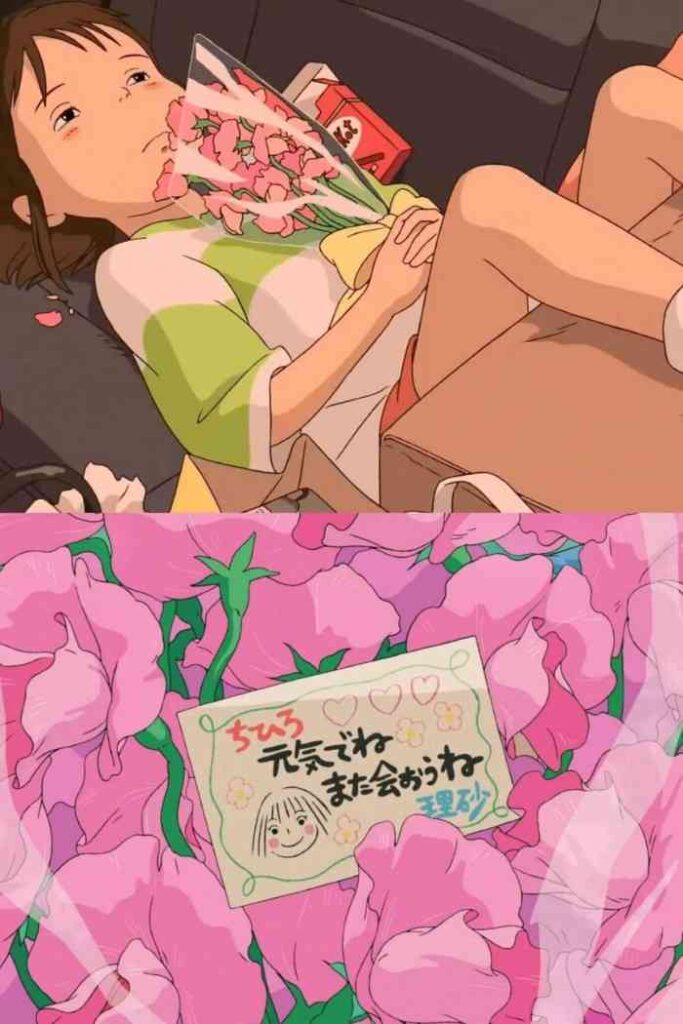
You can also swap the pink for another color, obviously! I’m just using pink because we’re recreating the farewell bouquet Chihiro received at the beginning of the movie “Spirited Away”!
I’m also using green seed beads that I will use for the stems of the flowers. I used two different shades of green, but one is perfect as well (I ended up preferring the result with only one shade, personally).
Using multiple colors in a project is always nice, because it adds dimension to it. But it’s really not mandatory, and you can have a cute result without it as well.
- Copper wire 0.3
I’m also using copper wire for this project. You can take any color of your liking – I chose gold because it pairs very well with the pink beads, in my opinion. The width of the wire is 0.3.
I also created other flowers for another similar project and used 0.2 copper wire, it works as well. I would just twist it on itself to make it slightly thicker, if you don’t have 0.3!
- Ribbon
We will use some ribbon to make a bow! If you have a mini bow at hand, you can also use it, of course. In the movie, the bow attached on Chihiro’s bouquet is yellow, but my ribbon is more of a beige tint. If you don’t have any yellow color, you can go with what you have.
You can also manually change its color by coloring it with acrylic!
- Cellophane wrap
You’ll need a bit of cellophane wrap to wrap the bouquet like in the movie. If you don’t have cellophane wrap, you can also use another type of transparent plastic you have on hand.
- Cardstock
We will use cardstock to make the farewell card attached to the bouquet. It’s not absolutely mandatory, and if you have a printer, I’ll give you a template you can just print at ease. Making the card is quite tedious because the card is very small, so I would suggest you print it if you have a printer!
- Pens / Thin markers
If you decide to make the card by yourself, you’ll need some pens or thin markers. Chihiro’s card is very colorful, but if you don’t have many colors, you can always make it in all black! The colors you’ll need if you want to stick to the card in the movie: black, green, red, orange, yellow, blue
- Glue or tape
You’ll need to glue the ribbon to the bouquet, so you’ll need some glue or tape. You could also tie it with wire though, so if you don’t have tape, it’s okay!
Now let’s finally start making our DIY bead bouquet!
Making the Flower Head
Let’s start with creating a flower head, which forms the beautiful centerpiece of each bloom. You’ll need a 40-45 cm (16-18 inches) length of copper wire for each flower head – I always prefer having extra wire to work with!
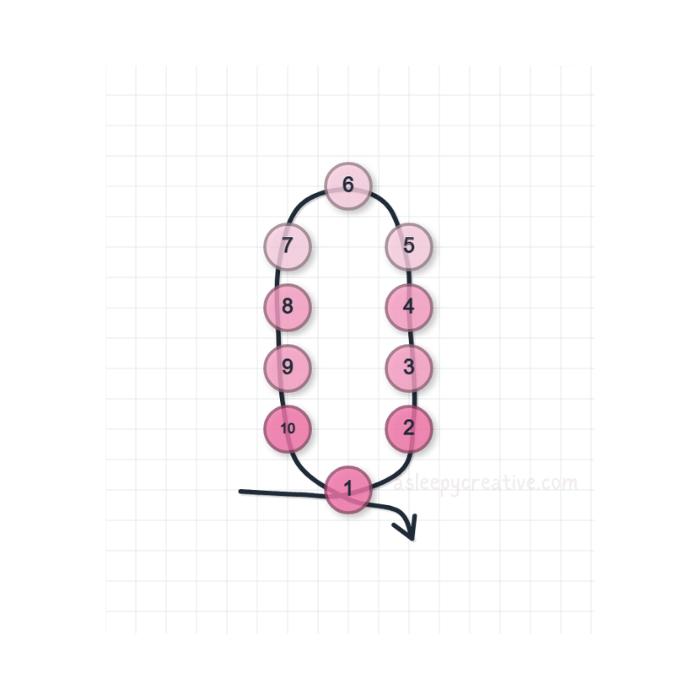
Creating the Bead Gradient
Begin by threading 10 beads onto your copper wire in a gradient pattern. For my example, I used: 2 dark beads, 2 medium beads, 2 bright beads, 2 medium beads, and 1 dark bead. Feel free to experiment with different color combinations for each flower to add visual interest to your bouquet.

Making the First Petal
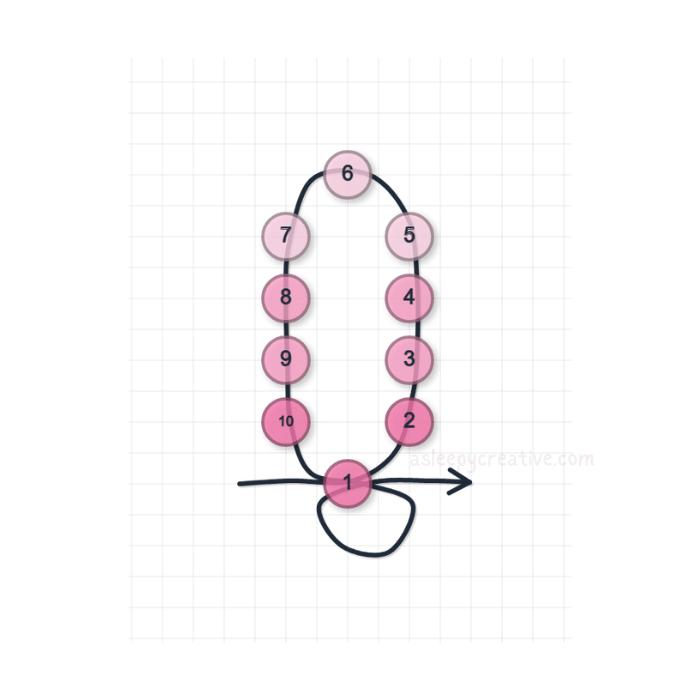
Once your beads are threaded, create a loop by passing the wire through the first bead.
To secure this petal, thread the wire through the same bead once more, creating a small loop around it. Congratulations – you’ve made your first petal!
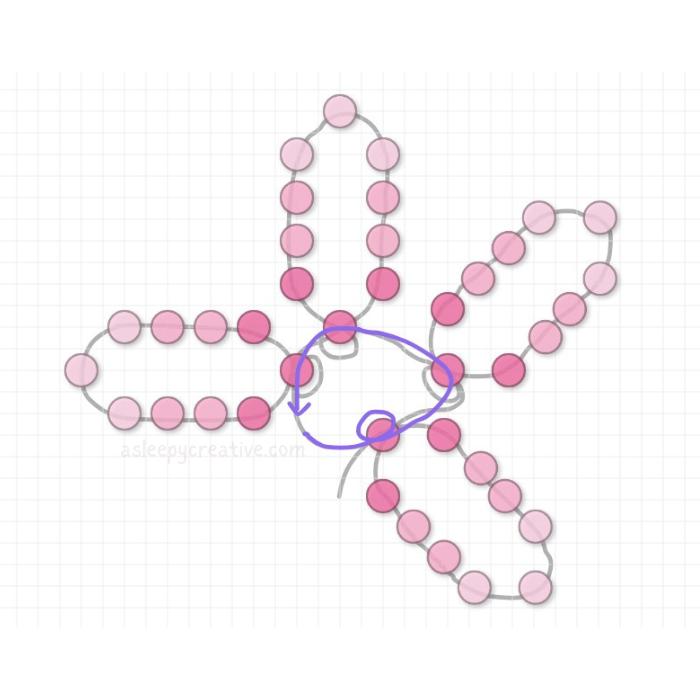
Creating Additional Petals
Repeat this process three more times to create a total of four petals per flower head. Keep your loops tight and close together for a neat, compact flower shape.

Important note: The fourth petal requires a different securing method. After threading your 10 beads and passing through the first bead as usual, take the opposite end of your wire and thread it through that same first bead. Secure it with a small loop just like the previous petals.
Securing the Flower Head
To make your flower head sturdy, thread the working wire through all the first beads of each petal loop, then trim the excess wire so it becomes invisible.
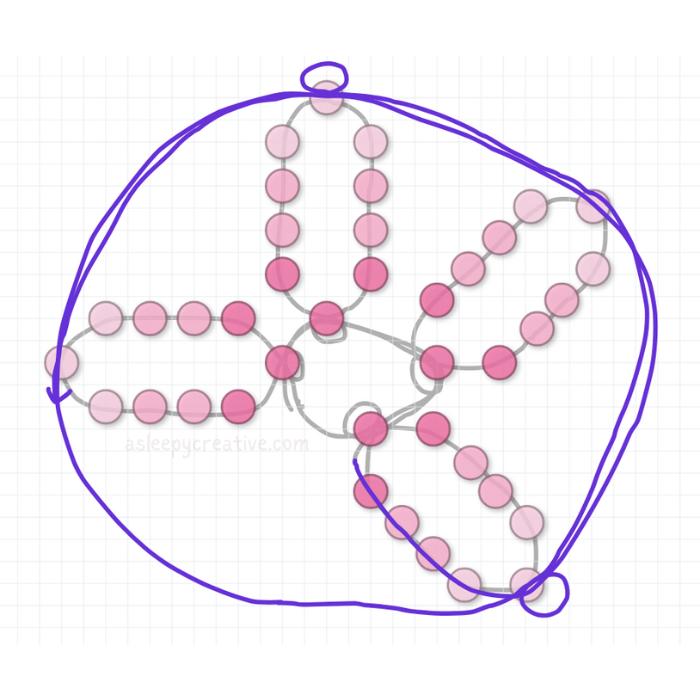
Finishing the Top
Take the remaining wire end and thread it through the four beads of your last petal loop.
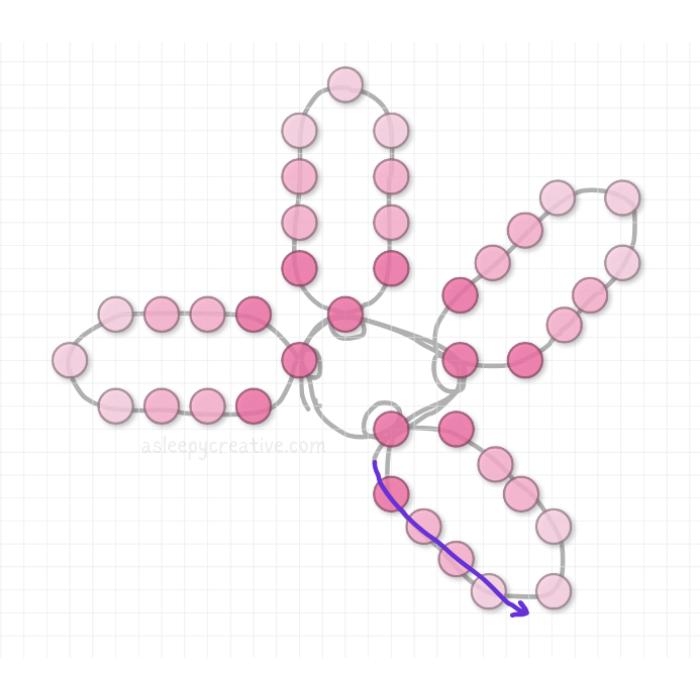
Next, pass this wire through all the top beads of each petal to create a circle around the flower’s center.
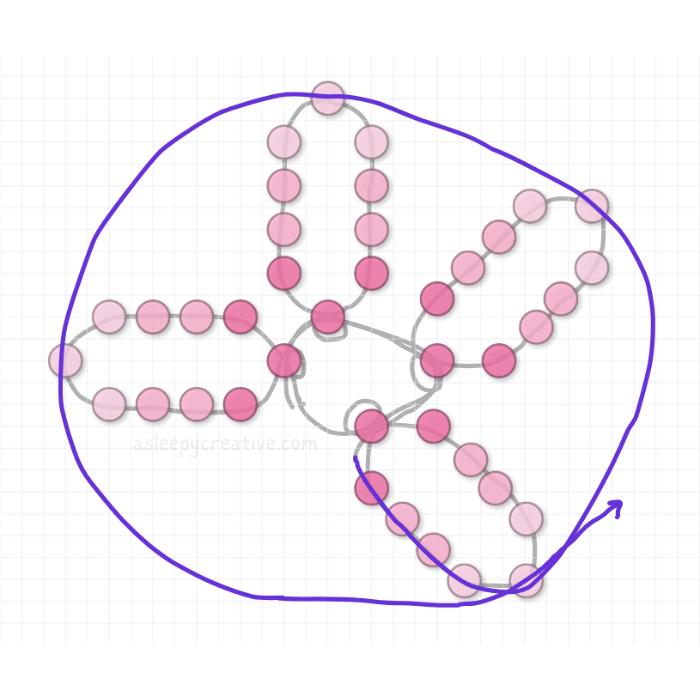
Gently pull the wire to tighten this circle, bringing all the petals together.
For final security, pass through each top bead again and wrap the wire around two of these beads before trimming the excess.
Your flower head is now complete and ready for the stem!
Making the Stem
Now that your flower head is complete, it’s time to create the stem and leaves that will bring your flower to life.
Preparing the Wire for the Stem
Start by examining your completed flower head from the bottom. You’ll see four dark pink beads that form the base of your flower.

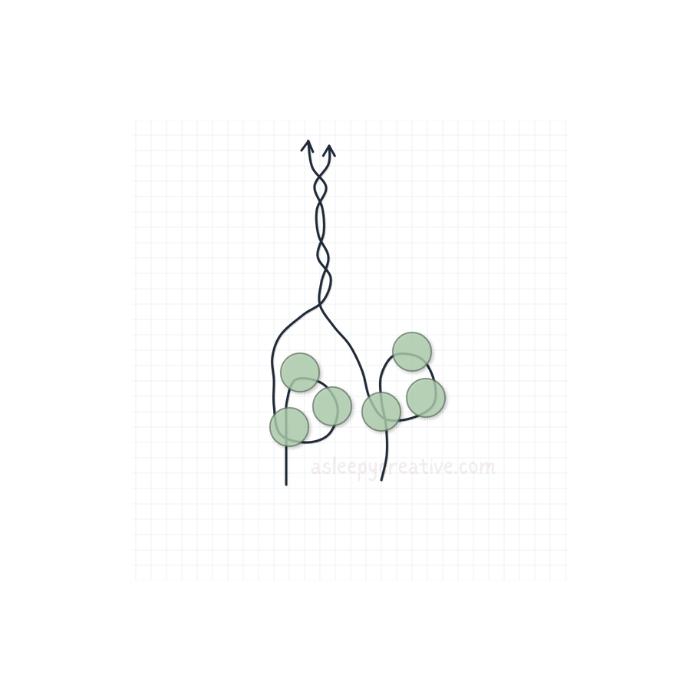
Take a 20 cm (8 inches) length of copper wire and thread it through these bottom beads, creating an S-shaped pattern as shown:
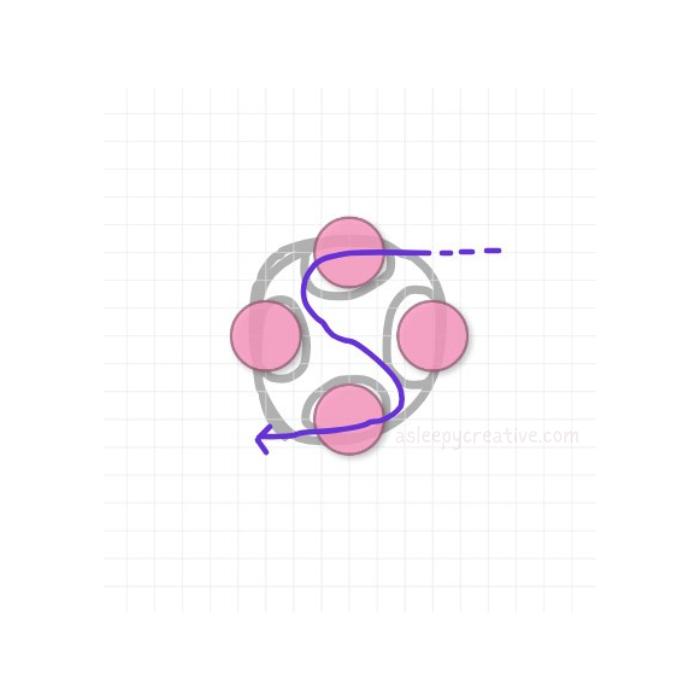
This will give you two wire ends extending from opposite sides of the flower base.
Creating the Leaves
Now you’ll make two small leaves using the wire ends. Take one end of the wire and thread three green beads onto it.
Next, pass the wire back through the first green bead you just added to create a small leaf loop.

Pull gently to tighten the leaf shape.
Repeat this same process on the opposite wire end to create a second leaf.

I like to use different shades of green for variety, but this isn’t essential – use whatever green beads you have available.
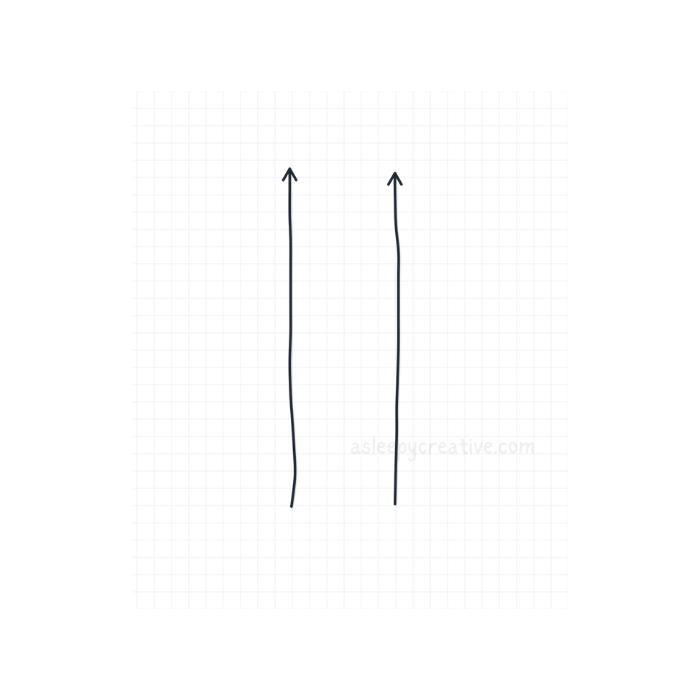
Twisting the Stem
Once both leaves are complete, it’s time to create the main stem. Take both wire ends and begin twisting them together tightly and neatly.
The key is to keep the twists close and consistent so the stem holds together securely when you add beads to it.
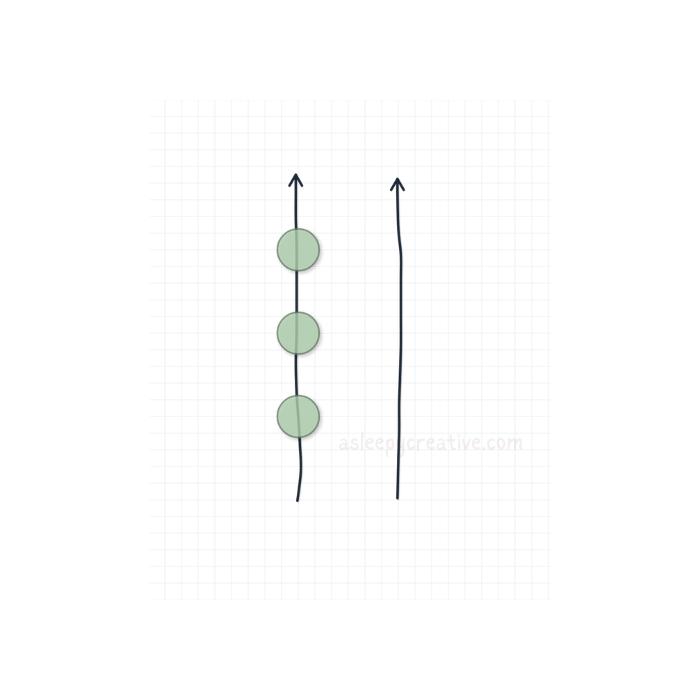
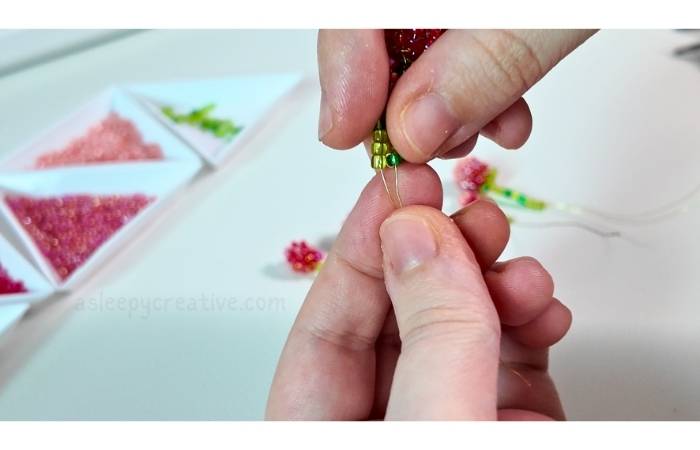
Adding Stem Beads
Thread green beads onto your twisted stem wire.
The number of beads can vary – I used eight beads for this stem, but feel free to make some stems longer or shorter to add visual interest to your final bouquet.
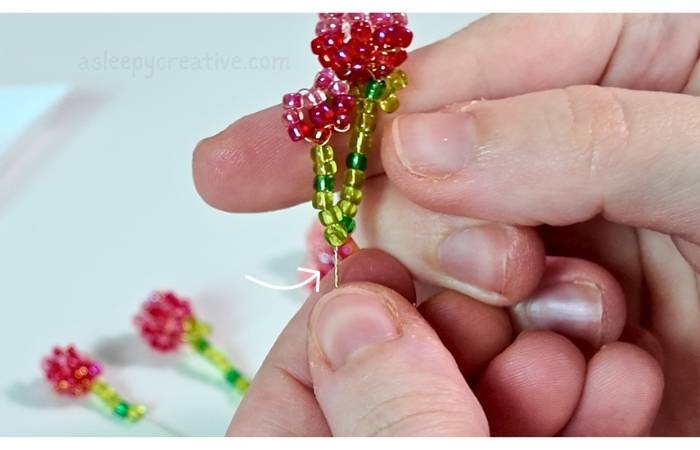
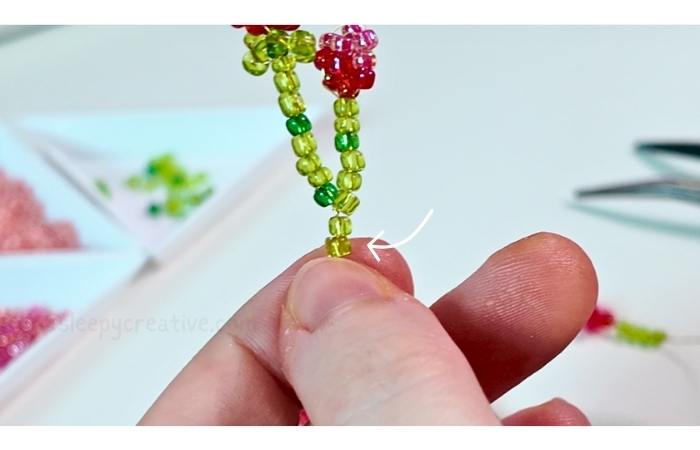
Securing the Stem
When you’ve added all the beads you want, secure the stem by making a small loop at the end.
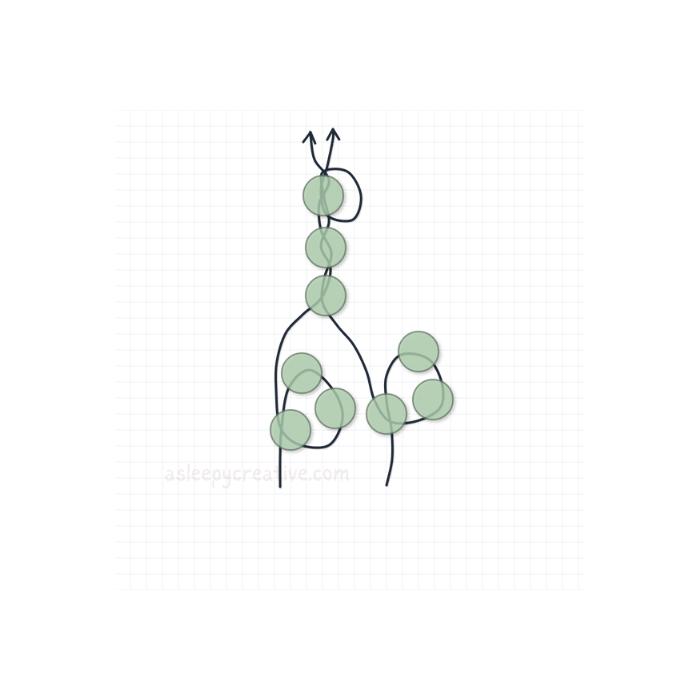
Make sure to leave the remaining wire relatively long – you’ll need this excess wire later when assembling your bouquet. Having extra length also allows you to adjust the stem length if needed.
Your first complete flower is now ready! Time to make several more flowers before moving on to the bouquet assembly.
Making Multiple Flowers
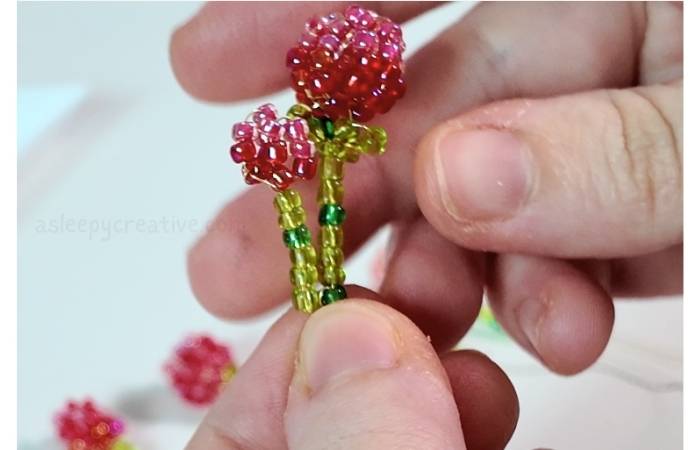
For each mini bouquet, you’ll need to create six flowers total: three large flowers and three small flowers. The large flowers follow the same pattern we just covered with the 10-bead petals.
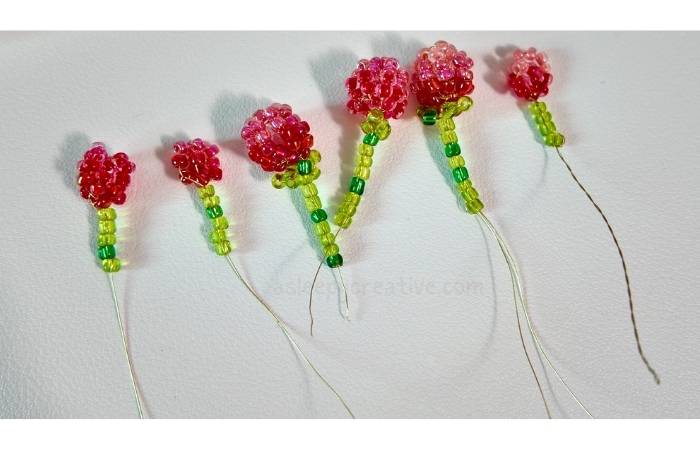
Creating Small Flowers
The small flowers use a simpler pattern – instead of 10 beads per petal, use fewer beads to create more delicate blooms. You can see the size difference clearly in the image above, where the smaller flowers create a lovely contrast with the larger ones.
Here is the pattern for the smaller flower:
Varying the Gradients
Don’t be afraid to experiment with different color gradients for each flower. I like to change up the bead patterns because it adds visual dimension to the final bouquet.
The key is to make each flower unique while maintaining the overall color scheme. This variation will make your bouquet look more natural and visually interesting.
Assembling the Bouquet
Once all your individual flowers are complete (for the first part of the bouquet), it’s time to bring them together.
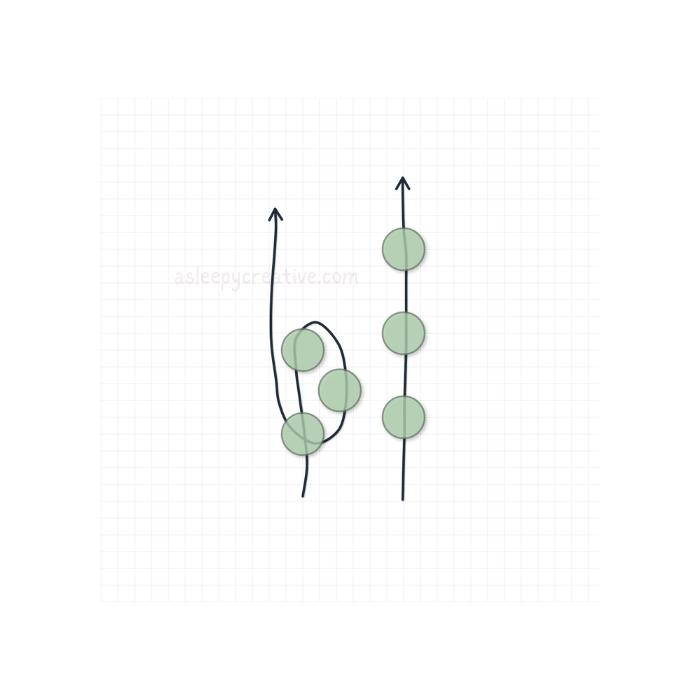
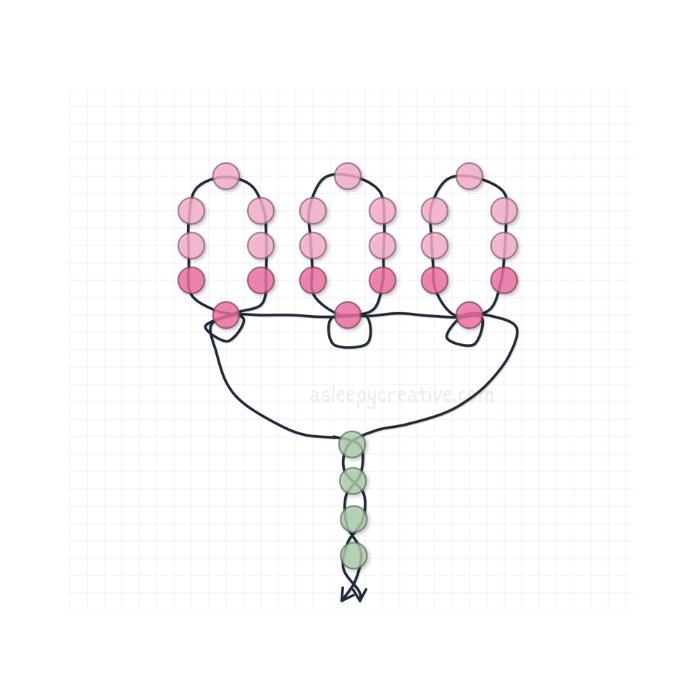
Combining Flowers
Start by selecting which flowers you want to pair together. I like to place a large flower next to a small flower as this creates a nice visual balance.
Take the wire stems of two flowers and begin twisting them together tightly and neatly.
Put the wires close together when you’ve chosen the two flowers you want to pair
Then twist, and twist, and twist!
The goal is to merge all flowers into one main stem, so the final bouquet remains thin enough. This is crucial since we’re creating a miniature bouquet that needs to fit in a small wrapping.
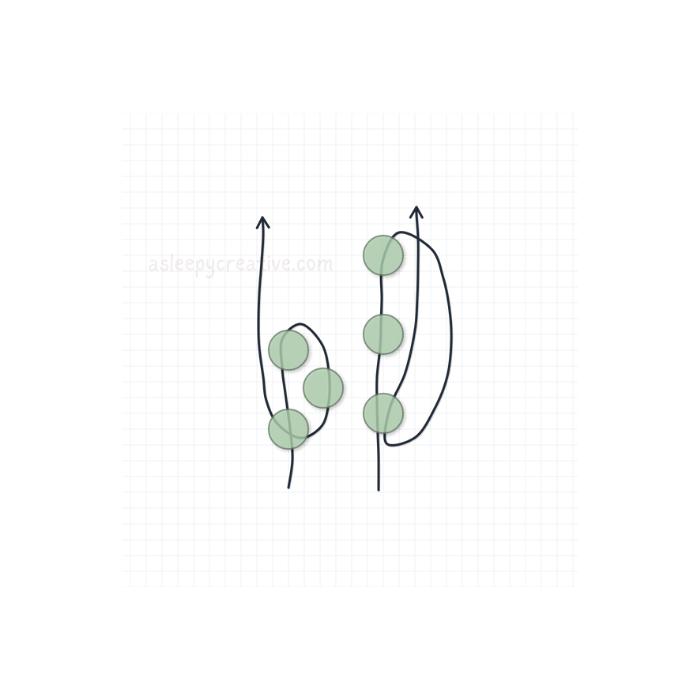
Adding Green Accents
As you twist the stems together, periodically add green beads between the joining points to create different levels and add more greenery to your bouquet. This helps break up the wire sections and makes the bouquet look more natural.
Managing Wire Thickness
During the assembly process, trim excess wire when the twisted stem becomes too thick. You want to maintain a workable thickness that still allows you to thread additional beads onto the stem.
Final Assembly
Continue this process until all six flowers are joined together in one beautiful bigger flower.
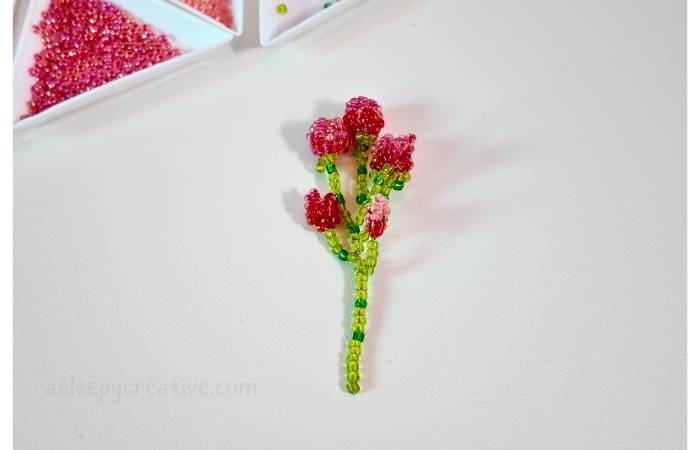
Secure the final stem with a loop through the last bead, just like you did with the individual flowers.
The result should be a charming mini bouquet (one part of the final bouquet) with varied flower sizes and a thin stem.
Now, we need to repeat the process we’ve been through from the beginning to make 2 more of these, and reach this stage, with three mini bouquets assembled:
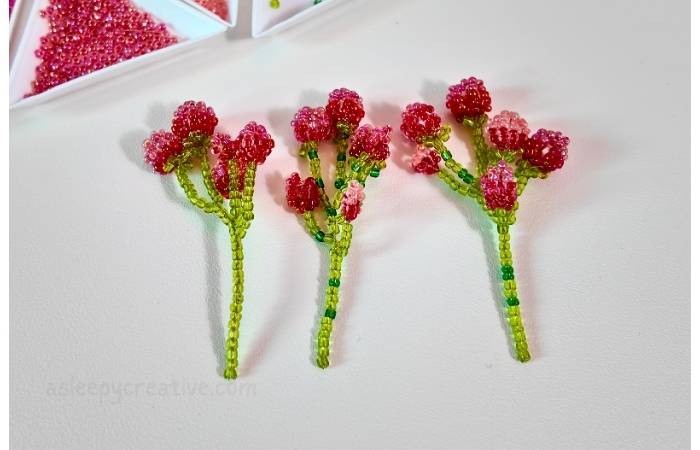
As I mentioned previously, you can also stick to 2 big flowers if you prefer and if you don’t have time to make more.
And once you’re done, you’re finally ready to wrap your creation!
Wrapping the Bouquet
Now comes the transformation that turns your beaded flowers into an adorable mini bouquet gift!
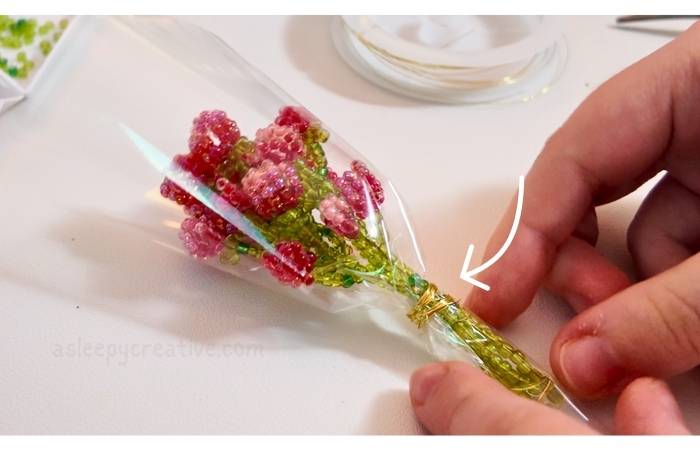
Securing the Bouquet
First, you’ll need to secure your assembled flowers so they stay together beautifully. Take a 20 cm (8 inches) piece of wire and wrap it around the stem of your bouquet.
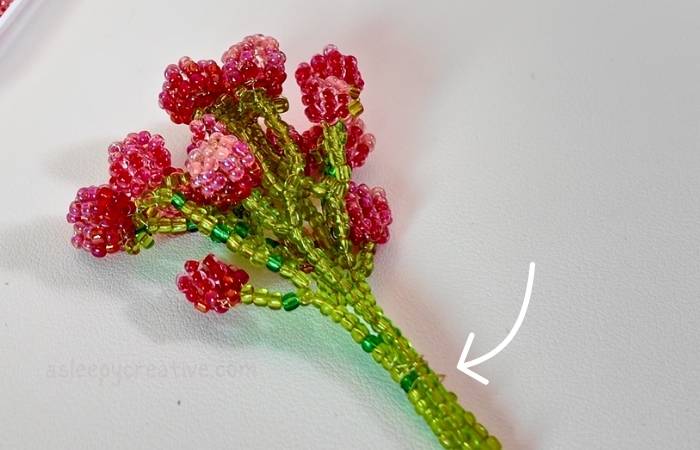
I know we can’t see it very clearly in the picture, but trust me, there’s a wire wrapped around the stems, lol! This ensures all the flowers remain in their perfect positions.
Preparing the Cellophane
Cut your cellophane wrap into a square that’s larger than your bouquet – it’s always better to have too much material than too little! You’ll be able to trim excess later, but you can’t add more if you cut it too small initially.
Creating the Wrap
Shape your cellophane into a cone form that can easily accommodate your bouquet.
Don’t worry if this feels a bit clumsy at first – it takes a little practice to get the hang of it! If you have washi tape or transparent tape available, you can use it to temporarily hold the cone shape.
Inserting the Bouquet
Carefully place your bouquet into the cellophane cone.
The flowers should sit comfortably inside with the stem extending out of the bottom opening.
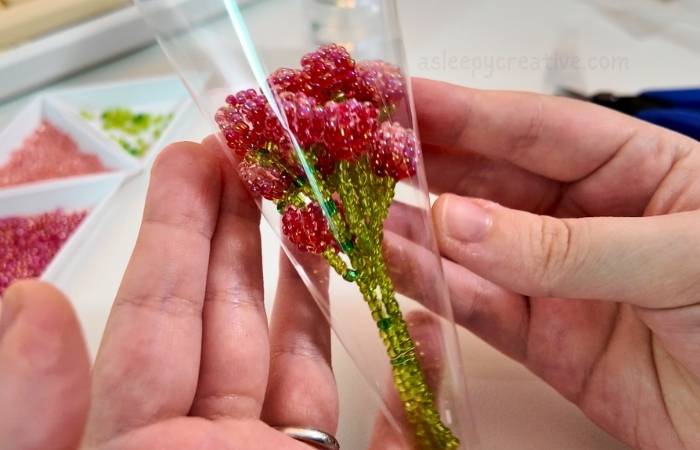
Securing the Wrap
Now comes the crucial step: tighten the cellophane around the stem using your fingers.
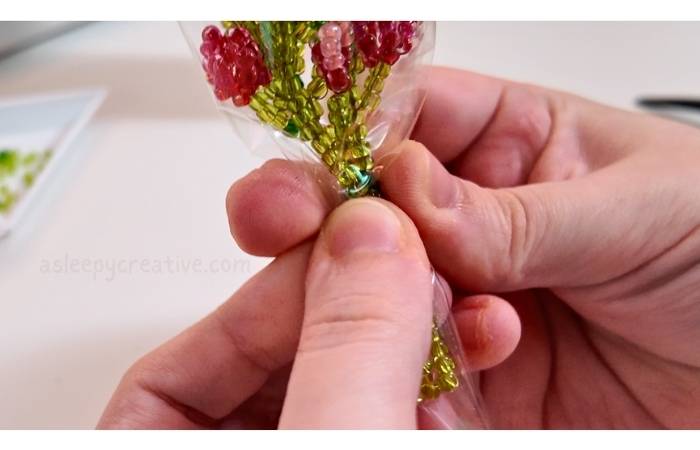
Press the wrap closely around the stem area to create a neat, professional-looking finish. Once you have it positioned correctly, wrap your copper wire around the cellophane to maintain this shape and keep everything secure.
Final Trimming
Wait until everything else is complete before trimming the excess cellophane. Cut gradually and conservatively – you can always trim more, but you can’t add it back! This step-by-step approach will help you achieve the perfect length without any regrets.
The result should be a beautifully wrapped mini bouquet!
Making the Bow
This is the perfect time to add your mini bow, or to make it if you don’t have one at hand.
Materials Needed
You’ll need approximately 30 cm (11.8 inches) of thin ribbon to create your mini bow.
Step-by-Step Bow Instructions

Step 1: Start by creating a small loop with your ribbon, leaving a tail on each side. Hold the loop firmly between your fingers.
Step 2: Cross the ribbons over each other to form an “X” shape. This creates the foundation of your bow structure.
Step 3: Take one ribbon end and loop it through the center opening you’ve created. The end of the bow you’re passing through the center will want to follow, let it follow!
Step 4: Pull both ribbon ends gently to tighten the bow. Adjust the loops to make them even and create a balanced, symmetrical appearance.
Finishing the Bow
Once your bow is shaped to your liking, trim the ribbon tails to your desired length. You can cut them straight across or at an angle for a more polished look.
Attaching to Your Bouquet
Apply a small dab of craft glue to the back of your finished bow and carefully position it over the wire wrapping point on your bouquet. This not only adds decoration but also cleverly hides the mechanical wire wrap, giving your mini bouquet a super cute look.
The bow should be proportional to your mini bouquet – remember, we’re working in miniature, so a delicate, small bow will look much more elegant than an oversized one!
Making the Card
The tiny handwritten card is what truly makes this bouquet feel like a gift straight from the world of Spirited Away. This adorable finishing touch adds so much personality to your creation!
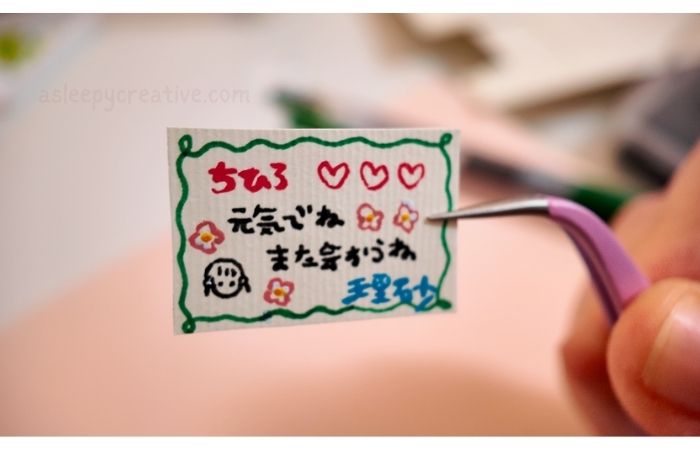
Card Dimensions
The card measures just 2.5 cm x 1.8 cm (1 inch x 0.7 inches) – truly miniature! Working at this scale requires patience and a steady hand, but the charming result is absolutely worth the effort.
Creating Your Card
You have two options for making your card:
Option 1: Hand-drawn (as shown in the image) Using thin markers or fine-tip pens, carefully draw your design on small pieces of white or off-white paper. In the video and through this article, since we’re remaking Chihiro’s bouquet, I copied the Japanese text that’s written on her card.

Option 2: Printed Template For those who prefer a printed option or don’t feel confident drawing at such a small scale, I’ve created a downloadable template that you can customize and print at home.
Check & download the template here ♥
The template includes several design options and can be modified with your own text and colors before printing.
Design Tips
- Keep text simple and legible at this tiny size
- Add small decorative elements like hearts, flowers, or stars
- Use bright, cheerful colors that complement your bouquet
- Consider writing in your preferred language – while Japanese adds authenticity, a personalized message in any language makes it more meaningful if you’re giving it as a gift!
Personal Touch
As mentioned in my video, I found that creating a custom message feels much more special than generic text. Whether you write a simple “Get well soon,” “Happy Birthday,” or any other sentiment, the personal touch makes all the difference.
Example (made with the template):

Attaching the Card
Once your card is complete and you’re happy with the design, simply tuck it into your wrapped bouquet. The card should peek out just enough to be visible and readable, adding that final magical touch that transforms your bead flowers into a complete gift.
Don’t worry if your first attempt isn’t perfect – I made several cards before getting one I was satisfied with. The tiny scale definitely takes some practice!
Final Touch – Mini Bottle Display
While your wrapped bouquet is absolutely beautiful on its own, there’s one more enchanting way to present your Spirited Away creation that takes it to the next level!
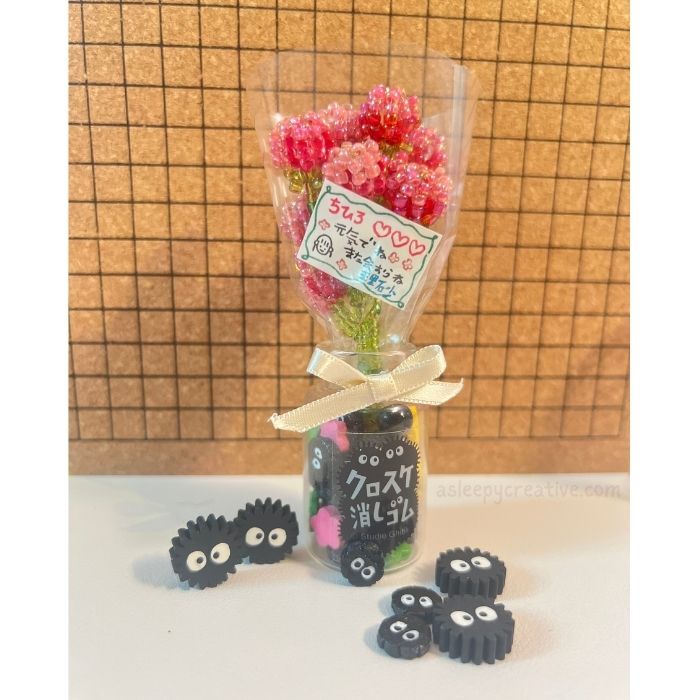
Creating a Magical Display
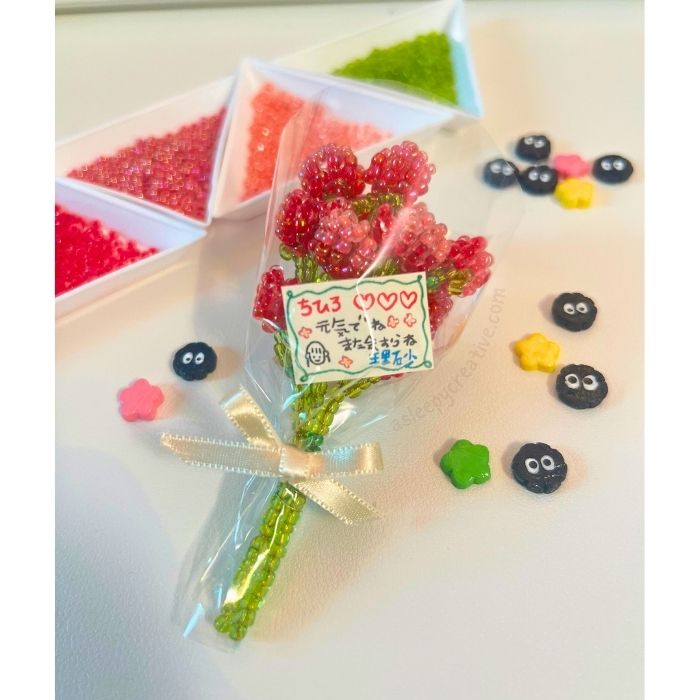
I discovered that placing the bouquet in a mini bottle transforms it from a simple craft project into a captivating decorative piece that can be displayed and enjoyed long-term. This presentation method is especially perfect if you’re planning to give it as a gift, as it becomes a lasting keepsake rather than something that might get damaged over time.
Adding Miniature Magic
To make the display even more special, I filled my mini bottle with tiny sprites that I crafted from air dry clay. These little characters add an extra touch of Studio Ghibli magic and create a complete miniature world around your bead flowers. The sprites reference the soot sprites (susuwatari) from Spirited Away, making the connection to the film even stronger.
Practical Benefits
Beyond the aesthetic appeal, the bottle display offers several advantages:
- Protection: Your delicate bead work is safely enclosed and protected from dust and damage
- Stability: The bottle provides a stable base, so your bouquet won’t tip over
- Longevity: Unlike fresh flowers, your creation will look beautiful indefinitely
- Unique gift: It becomes a one-of-a-kind decorative piece that anyone would treasure
Display Ideas
The completed bottle bouquet makes a perfect:
- Desk decoration for anime fans
- Unique gift for Studio Ghibli enthusiasts
- Miniature garden or fairy garden addition
- Special keepsake for someone who needs cheering up
- Conversation starter on any shelf or windowsill
Personal Reflection
This final step really brings the whole project together. What started as individual beads and wire becomes a complete miniature world that captures the whimsy and magic of Spirited Away. Every time I look at the finished piece, it brings a smile to my face – and I hope it does the same for you and anyone lucky enough to receive it as a gift!
The combination of the delicate bead flowers, the tiny handwritten card, and the magical bottle presentation creates something truly special that goes far beyond a simple craft project. It’s a piece of art that carries the spirit of creativity, patience, and the joy of making something beautiful with your own hands.

Wrap-up
Congratulations! You’ve just completed a truly remarkable miniature masterpiece. From threading your first gradient of beads to wrapping your final bouquet, you’ve transformed simple materials into something genuinely magical.
A Personal Note
Thank you for joining me on this crafting journey. Creating tutorials like this takes so much time, but also brings me so much joy because I get to share the magic of making something cute with fellow crafters around me. I hope this project has brought you as much satisfaction as it has brought me, and I’d love to see your finished bouquets if you’d like to share them!
Remember, every expert crafter started exactly where you are now – with curiosity, patience, and the willingness to try something new. Keep creating, keep experimenting, and most importantly, keep finding joy in the process of making beautiful things with your own hands.
Happy crafting! ✨