How to Add New Thread and Hide Your Ends in Beading (Peyote, Brick & 3D Beading)
Hello hello! I’m back with another beading article, and this time it’s about something I get asked about ALL the time: what do you do when you run out of thread?
Because yes, it will happen. Especially with 3D beaded animals, where you go through the same beads over and over again. And the first time it happened to me, I honestly panicked a little lol. Do I tie a knot? Will it show? Will my whole project fall apart?
Good news: adding a new thread is much easier than it looks, and once you know how to do it, you’ll never be scared of a short tail again. In this article, I’ll show you how to add a new thread in the middle of a project, and how to hide your ends so they’re secure and invisible, on flat pieces as well as on 3D shapes.
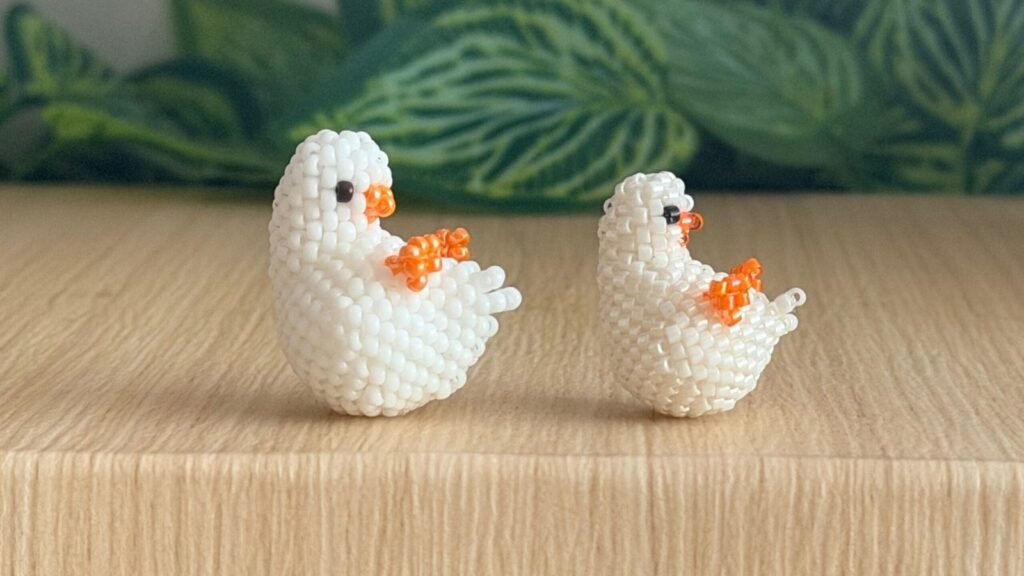
If you’re new to beading, you might want to check these articles first:
- How to Peyote Stitch: A Visual Guide (Even-Count, Odd-Count, and Advanced Techniques)
- How to Brick Stitch: A Visual Guide (Foundations, Basics, Increases, Decreases)
- How to Read Circular Peyote Stitch Patterns
Okay, let’s get into it!
When Should You Add a New Thread?
The most important rule: don’t wait until the very last centimeter. I know it’s tempting to squeeze in “just one more row”, but if your tail is too short, you won’t be able to weave it in properly afterwards, and that’s when things get frustrating.
I usually stop and add a new thread when I have around 15 cm (6 inches) of thread left. That leaves enough length to weave the old tail back into the work later.
A little tip to avoid running out too often: don’t cut a crazy long thread either. Around one to two arm span is comfortable. I personally always use the exact length of thread I’ll need for a craft (and it goes up to 3meters long, lol) but sometimes shorter is just more comfortable – longer than that and it tangles, knots itself, and wears out from being pulled through the beads again and again. It can be extremely frustrating when you’re a beginner.
What You’ll Need
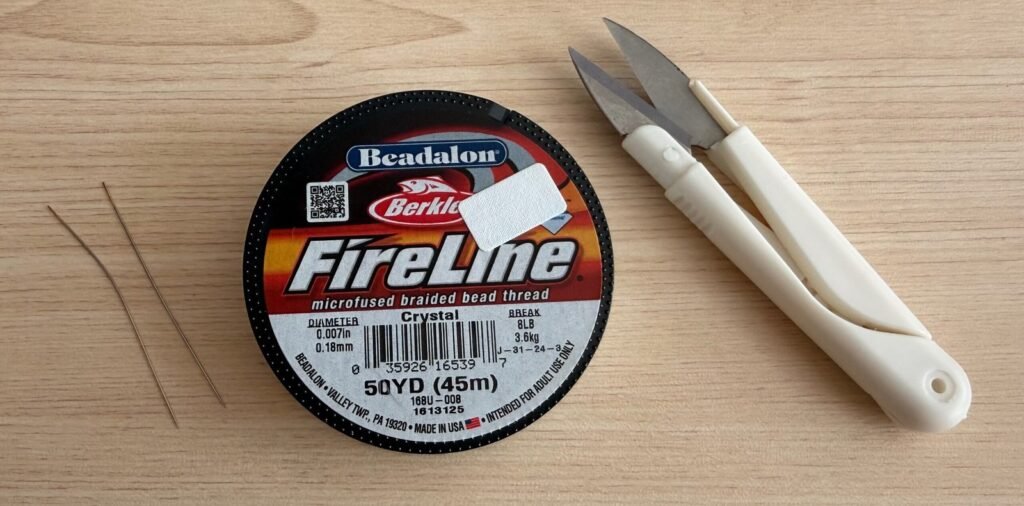
- Your beading needle – the same one you’ve been using (size 10, 11 or 12 depending on your thread and your beads!)
- A new length of the same thread – switching thread types mid-project can change your tension
- Small sharp scissors or a thread cutter to trim close to the beads – it needs to be sharp, else the cut won’t be clean and you’ll have a messy result
- Optional: a thread burner if you use a bonded thread like Fireline. It melts the end into a tiny ball so it can’t slip back out
Method 1: Weaving In the New Thread (No Knots) – My Favorite
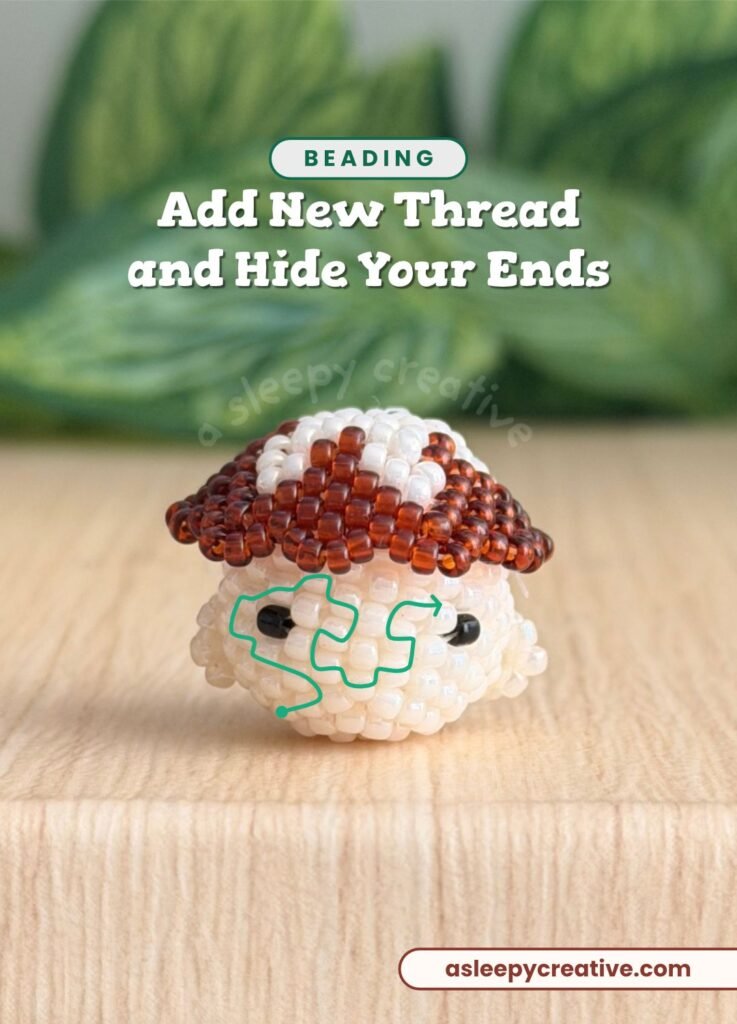
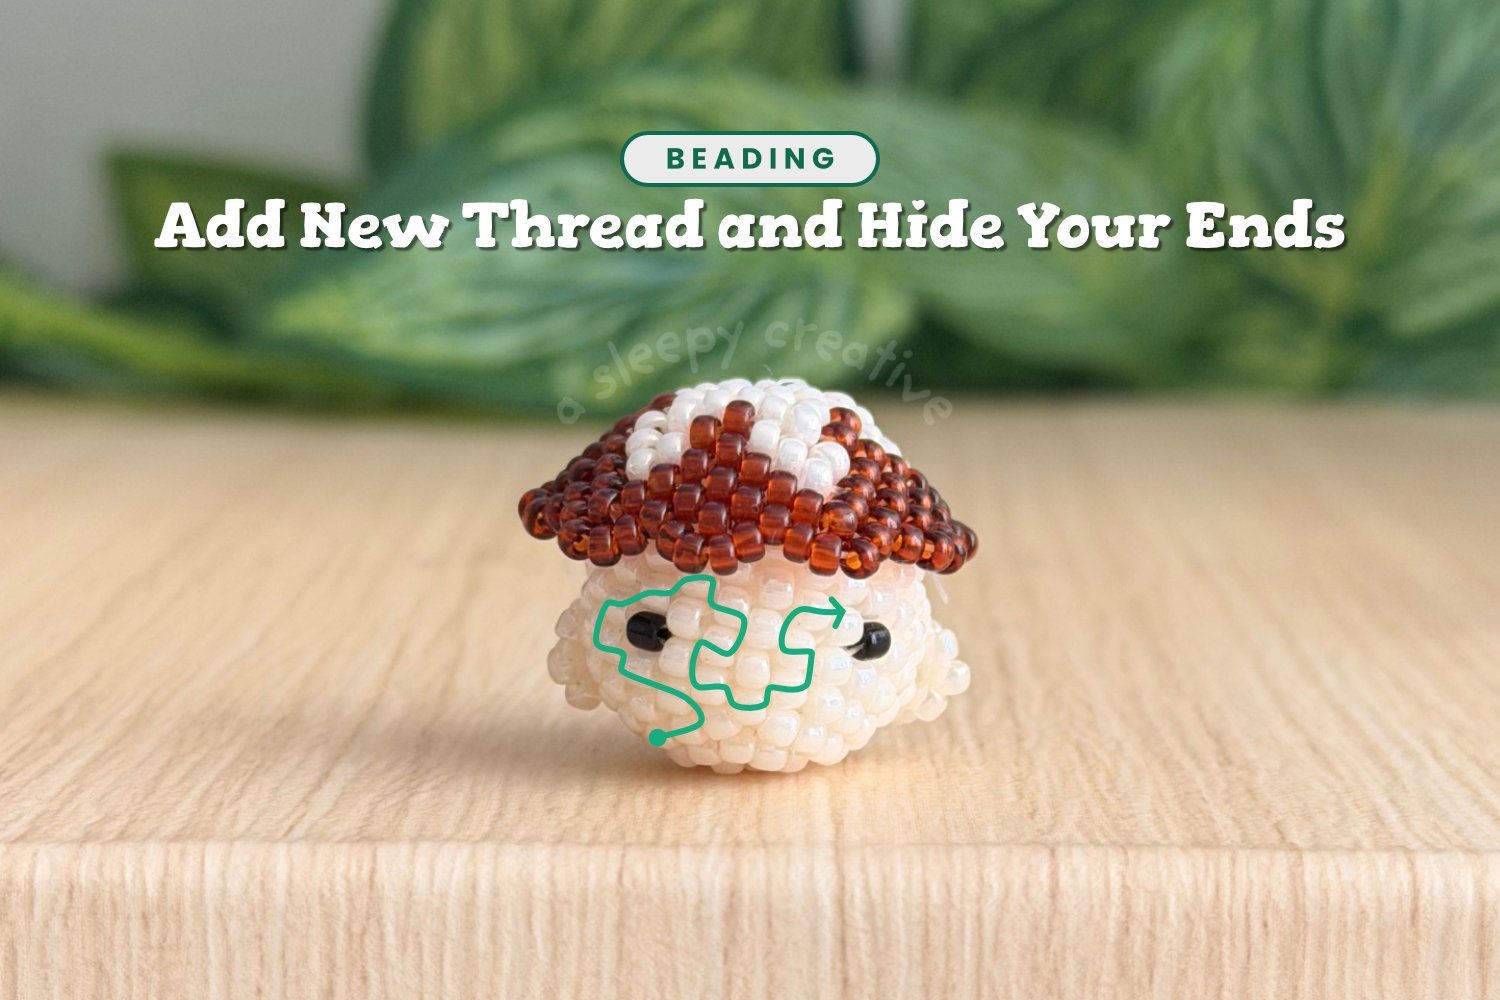
This is the method I use most of the time. There are no knots at all: the thread stays in place thanks to friction, because it goes through so many beads, in so many directions.
Step 1: Leave the old thread where it is
Stop beading and remove your needle from the old thread. Leave the tail hanging, we’ll take care of it later.
Step 2: Enter a few rows back
Thread your needle with the new thread. Go into a bead 3 or 4 rows below the row you’re working on, leaving a tail of about 10 cm – 4″ (you’ll trim it at the end).
Step 3: Follow the existing thread path
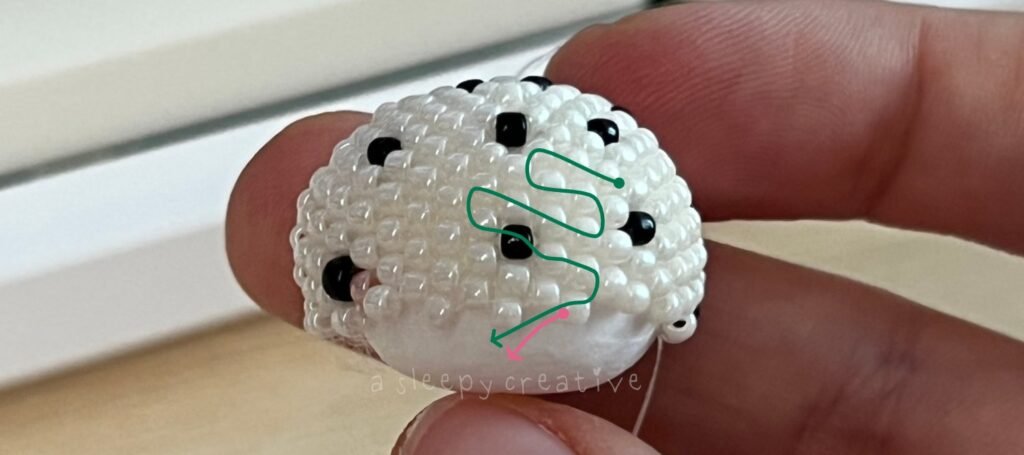
Now weave through the beads, following the same path the thread already takes in your work. In peyote stitch, that means zig-zagging diagonally from bead to bead, the same way you stitched them. In brick stitch, you go up and down through the columns. The most important is to keep your thread hidden while doing that, so it stays seamless.
And the key to this method working is to change direction a couple of times. Every turn adds grip, and that’s what keeps the thread from sliding out.
Step 4: Exit from the same bead as the old thread
Keep weaving until your needle comes out of the exact same bead the old thread was coming out of, in the same direction. This is super important: if you exit from the wrong bead, your next row will be off. Alternatively, you can also just complete a full row with your old thread and then start the new thread wherever you want. But if you’re following a pattern, starting at the exact same spot will be much easier.
Pull gently to get rid of any slack, and continue beading as if nothing happened!
Step 5: Weave in the old tail
After a couple of rows, thread the old tail onto your needle and weave it downward into the work, in the opposite direction, changing direction a few times again. Then trim both tails close to the beads.
I like waiting a couple of rows before doing this, because the new beads hold everything in place and the tension is easier to control.
Method 2: Half-Hitch Knots (Extra Secure)
If you’re using a slippery thread, or if your piece will be handled a lot (hello keychains!), you can add a couple of tiny knots for extra security. These are called half-hitch knots, and they hide nicely between the beads.
- While weaving through your work, come out of a bead.
- Look at the two beads right next to it: slide your needle under the thread that connects them (the little “bridge” of thread between them).
- Pull the thread through, but stop before it’s tight so a small loop is left. Then pass your needle through that loop.
- Pull slowly so the knot tightens and settles between the beads.
- Go through a few more beads and repeat once or twice in a different spot.
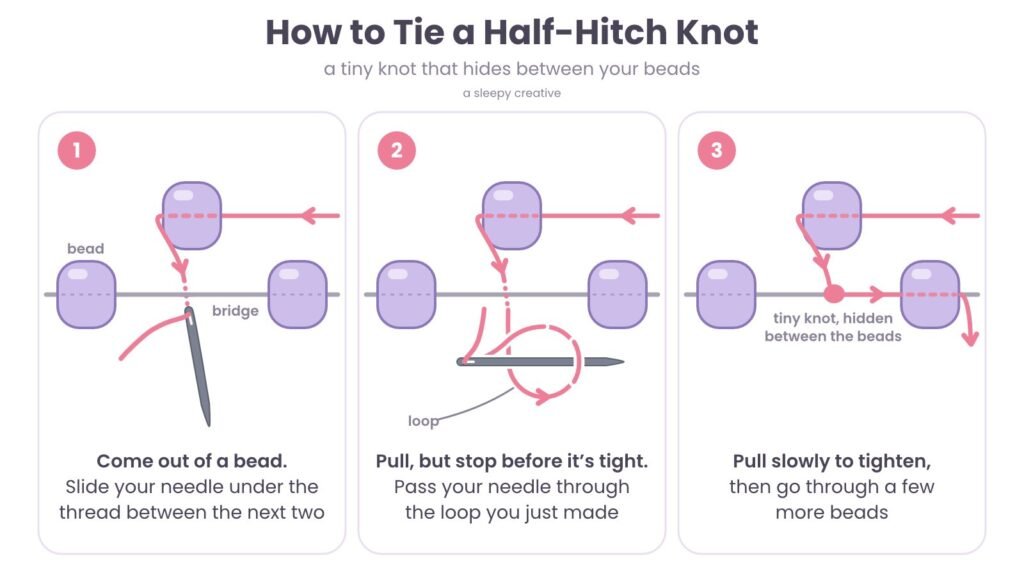
Always pass through a few more beads after your last knot before trimming. That way the end of the thread is hidden inside a bead, not sitting right next to the knot.
One thing to keep in mind: knots take up space in the bead holes. If you know you’ll pass through some beads again later (for example to attach ears or wings), try to keep your knots away from those spots.
Method 3: Tying the Old and New Threads Together (and Why I Avoid It)
This method works, but I don’t recommend it for peyote or 3D beading:
- The knot is bulky and often too big to slide inside a bead, so it can show
- It’s a weak point: if it comes undone, there’s nothing else holding the thread
- It can mess with your tension right where the two threads meet
If you do use it, make sure to weave both tails in afterwards anyway.
How to Hide Your Ends When You Finish
Finishing a project works exactly the same way as weaving in an old tail. But there are a few differences depending on what you’re making.
On flat pieces (peyote, brick stitch, square stitch)
Weave back into the piece, following the thread path, and change direction at least two or three times. Add a half-hitch knot or two if you want, go through a few more beads, then trim close.
Try to stay inside the beads and avoid crossing over the edge of your piece, because a thread going around the outside of a bead is visible.
On 3D beaded animals and spheres
3D pieces are actually really forgiving here, because you have an inside to hide things in!
Weave your thread through a few rows as usual to secure it. Then, push your needle between two beads into the inside of the shape, and bring it out a little further, between two beads. Pull gently, trim the thread close to the surface, and the end will disappear inside the shape.
This works best once your shape is closed (and stuffed, if you use stuffing). If you’re using foam, you can even go through the foam with your needle (be careful for your fingers though). Just don’t pull too hard, or you’ll squish your animal out of shape.
If you’re making a keychain, secure your ends before attaching the hardware, and keep the area around the top bead extra solid – that’s the part that gets pulled the most. I talk more about attaching keychains in How to Make 3D Beaded Animals for Beginners.
Common Mistakes (that we all made)
- Waiting too long: a 5 cm tail is almost impossible to weave in. Stop earlier!
- Coming out of the wrong bead: double check before you start the next row. In circular peyote, it’s easy to get lost.
- Filling up bead holes: every pass takes space. If a bead feels tight, choose another path instead of forcing your needle (that’s how beads crack!).
- Pulling too tight: it can pucker your work or distort a 3D shape. You want snug, not strangled
- Trimming too early: keep both tails until the new thread is well secured. You can always trim later, but you can’t add length back.
FAQ
Do I need to tie knots at all?
It is not needed, but you can! If you weave your thread through enough beads and change direction a few times, friction is enough to hold it. Knots are just extra security. If you really want to tie knots, you can tie a secure knot before weaving the ends into your beadwork as I explained earlier. This will give an extra layer of security.
How many beads should I weave through?
There’s no exact number, but I aim for at least 3 or 4 rows’ worth, with three or four changes of direction.
Can I use glue?
You can put a tiny dot of jewelry glue on a knot, but be careful: glue can harden and block bead holes, and some glues damage bead finishes. I prefer weaving properly instead.
Ready to Practice?
The best way to get comfortable with adding thread is simply to make a few projects. My 3D beaded ball tutorial is a great place to start, and if you want to go further, the 3D Beaded Whale Pattern PDF and the tiny 3D Beaded Baby Bird Pattern PDF are very beginner-friendly. You can browse everything in my shop ♡
Happy beading!
Want to save this tutorial for later? Pin it on Pinterest ♡