I wrote an article about horse drawing ideas (with a couple of tutorials) not long ago, and while studying horses, I literally fell down a rabbit hole: My Little Pony. Actually, My Little Pony has been around for SO LONG, and they’ve come such a long way.
Back in the day, they didn’t look anything like they do now, and I’m here for it – because omg, did they get super cute. It made me so excited about drawing them and learning how to draw them properly.
So I decided to write an additional horse-related article: a “how to draw My Little Pony” tutorial! ♥ This one’s going to be a bit more in-depth than my usual tutorials because I really tried to study the subject properly (let’s just say I got a little obsessed).

BUT keep in mind that, just like you (probably), I’m not an MLP pro. Everything I’ve learned comes from: 1) personal observation (studying real horses), 2) tutorials I found on Pinterest, and 3) my short time obsessing over this majestic animal – so there are definitely areas where I’m lacking and where my explanations won’t be fully satisfactory. But I’ve reached a point where I really like what I draw when I draw ponies, so let’s discover them together!
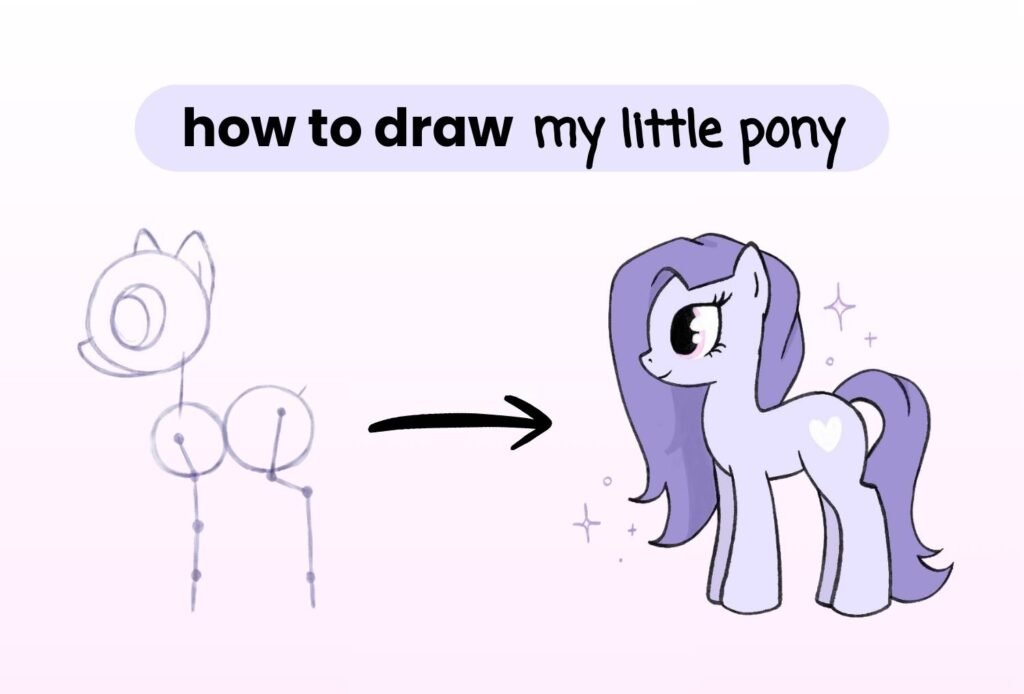
How to Draw My Little Pony
Part 1: The Head
Let’s start by drawing the head of our pony!

Step 1: Just start by drawing a circle
Step 2: Add the nose to your circle – note that the position of the nose (as well as its shape) will differ according to the position of your pony, and the angle of its face (because of perspective). The shape will also vary depending on the gender of your pony, as you can see on the drawing.
Males will have more square jaws compared to females, whose nose is smaller and slimmer. You can also develop your own style and draw in a completely different style, but this is a general rule. 🙂
Step 3: Now time to draw the ears – the ears also come in many shapes & forms. But the basic ear’s shape resemble a triangle.
Step 4: Finish your drawing of the head with your pony’s eye. The eye is properly gigantic on a pony’s face, and all the other features are really small (the nostrils and mouth). I’d say the eye takes around 1/4 of the whole face, but it also depends on style and preferences.

Some additional head angles for those who want to study more. The 3/4 view is definitely the most difficult at the beginning I believe, and it’ll take a lot of practice to get it right (especially the hidden eye). But I think with practice it comes together quite nicely (I had to practice for this but after a bit I could draw it without too much pain lol)
Now let’s dive into the next part to draw: the body! ♥
Part 2: The Body
")
First, let’s talk about proportions. A pony is around 3 head tall, which means you can put around 3 times the pony’s head in the pony’s whole height. I prefer drawing mine a little less than 3 heads, and some people draw very different according to their own style.
The pony’s size also depends on whether it’s a female, a male, or their age (baby vs adult), etc. But we’re just gonna study the standard pony here okay? ;; toomuchtostudy
")
We draw the body by starting with two circles. They need to fall within the line 1 and 2 on the drawing (that you probably have drawn by now) These two circles can be the same size, but I realized while practicing that I prefer drawing them two different sizes. The front circle slightly smaller than the other one – but that’s just personal preference.
You’ll see a lot of artists drawing things differently, and I think you should just stick to what feels good for you. So that’s what I do for me as well! ♥
")
Now on to another hard part: the legs. We need to simplify the legs of a horse to fit them into this tiny pony. You can see on the drawing here that I colored each part respectively on the horse as well on the pony, for you to visualize how the horse’s leg translates onto the pony’s body.
It becomes very stilized for the hind leg, but is quite similar for the front leg.
")
Once you’re done with drawing the joints and the sticks linking them all together, we can finally start shaping our pony.
To draw the leg, we follow the skeleton we just sketched. It’s important to draw the pony’s leg getting gradually thicker as you get close to the knuckle (the bottom of the leg), because it gives the whole pony vibe to your drawing.
")
And now that you’re done with the legs, you can basically outline the rest of your pony as well and get your base done! Don’t forget to draw the legs that are half hidden as well – since a pony has 4 legs.
You’ve got your base all ready now, it wasn’t that difficult, right? But now that we’re done with that, let’s focus on the legs particularly.
Focus: The Legs
")
It’s important to focus on the legs if you want to draw ponies moving around, not just a “pony base” with no motion and dynamism. You could get around without knowing much copying bases you can find on Google or Pinterest, but you probably will want to know more than that, so let’s get into it.
As you can see on the drawing, I’ve written the name of each joint of both the front leg and hind leg. You don’t need to study that or know it by heart – even though it would be nice to do so.
")
The joints have limited range of motion, and it’s important to visualize and know them to avoid making your pony look super weird by giving the legs angles that are impossible. But it’s also important to remember that we are drawing cartoons: so sometimes impossible angles are not that big of a deal!
The shoulder can bend forwards, backwards and out to the sides. The elbow will bend forward, lifting up the whole leg. The wrist bends inward, mostly drooping when the elbow is lifted. The knuckle also bends inward, following the wrist.
The hip can bend forwards, backwards and out to the sides, similarly to the shoulder. The knee bends backwards, lifting up the hind leg. The heel bends forward, and the knuckle of the hind leg bend inward.
If you know these, there are way less chances that you make a big mistake while drawing your legs next time!
Front Leg Examples
")
If you need some examples of front leg motion, here is what to do and what to avoid. With the right structure and fundamentals, your drawing will immediately look better! ♥
Back Leg Examples
")
Same with the back leg. The back leg is actually probably the most difficult of both, since it’s naturally slightly bent at all times but remains relatively stiff in comparison.
")
And here are both legs in motion together.
As you can imagine, the first image is unlikely to happen in real life to a horse, but you could imagine it being a thing for cartoons (example: the pony just put their legs on that side in some mud)
And when a pony is laying down (or sitting), the range of motion is quite big, as you can see (especially on the hind leg here).
By knowing these simple rules of the pony’s structure, you can make a lot of nice poses ♥ And don’t get too strict with them – it’s okay to have things misplaced or slightly wrong!
And now that we’ve studied the basics of ponies, let’s draw a couple with additional tutorials 🙂
MLP Tutorial: A Cute Pony
")
How to Draw my Little Pony Step by Step
a cute basic pony ♥
")
Step 1: Okay so we’re starting super simple here! Just draw one circle for the head (1), and then two circles below for the body (2 and 3), just like we’ve studied in the main tutorial of this article.
Step 2: Then sketch in those purple leg guidelines. This is literally just the skeleton we talked about before – nothing fancy yet!
")
Step 3: Add the neck connecting the head to the body, and sketch in where the tail is gonna go. You can see the construction is really coming together now. It looks super basic still but this skeleton is doing all the heavy lifting for us.
Step 4: This is where it starts looking like an actual pony! Follow those construction lines you made and start giving the legs some shape. Remember what I said about the legs getting gradually thicker as you go down? That’s what we’re doing here.
")
Step 5: Don’t forget to add the semi-hidden legs as well, of course~
Step 6: Add the ears and nose – keep them simple for now, we’re just getting the basic shapes in place!
")
Step 7: Now it’s time to connect everything together! It’s really starting to look like a pony, right? Remember the tips from the main tutorial: slim nose & curves for females, and more boxy for males. Here, we’re drawing a female.
Step 8: Now erase your consutrction lines (and add the eye, too) and you have your cleaned up base! ♥ this is your foundation for adding all the fun stuff!
")
Step 9 & 10: Time for the mane and tail! This is where your pony gets its personality. Draw flowing hair – I always make the mane swoop nicely and the tail big and bouncy. There’s no wrong way to do hair honestly, just have fun with it and make it flow naturally.
Note: An important fact that you might have observed already is that the mane & tail always match! Here, we’re drawing straight hair with some movement. The same kind of movement should appear on both tail & mane.
")
On the left you have your complete base with all the outlines clean and ready. On the right, you add the eye (remember, HUGE eye – like 1/4+ of the face), and any other small details like nostrils, mouth~ And tada! You’ve got yourself a pony! ♥

Adding some colors and we’ve got our final pony!
My Little Pony Tutorial Step by Step
")
How to Draw This Whimsical Pony Step by Step
")
Step 1: Alright, back to basics! Draw your three circles – circle 1 for the head, and circles 2 and 3 for the body. You know the drill by now! This is the foundation for literally every pony you’ll ever draw, so get comfortable with these circles.
AH – and this one has a more complex pose, so yeah the circles are placed differently.
Step 2: Now add those (pink) leg guidelines! You can clearly see here: this pony is in a more dynamic pose – it’s not just standing there, it’s got some movement happening. The legs are positioned differently than in the basic standing pose, which makes it way more interesting.
")
Step 3: Connect the head to the body with a neck line, and mark where the tail is gonna flow from.
Step 4: Add the ears (remember, triangular shape!), nose, and keep working on those legs by adding the two other legs.. The construction is really coming together now.
Now it’s time to connect everything together, once again!
")
Step 5: Finalizing the Base – Okay so on the left you can see the “base w/ skeleton” where all your construction lines are still visible. On the right is your clean “base” where you’ve gone over everything and created smooth outlines. This is basically just cleaning up all those messy guide lines and making one cohesive pony shape. The pose is really clear now!
")
Step 6: Time for the mane! Start sketching in the hair flowing from the top of the head. I love how the mane curves and flows – it adds so much life to the drawing. Don’t be afraid to make it big and bouncy, that’s literally the whole vibe of MLP!
Also be mindful that the gravity has effect here: unless there is wind blowing, the mane should go towards the ground.
Step 7: Now add the tail! Make it flow nicely and give it volume. The tail should complement the mane, so if your mane is super flowy and wavy, your tail should match that energy. This is where your pony really starts to get its personality!

Steps 8-9: On the left (step 8) you have your final clean line art – everything outlined and ready to go. On the right (step 9) you can see it all colored in! This pony is pink with a yellow mane♥ You can see how all that construction work paid off – the pose looks dynamic, the proportions are correct, and it’s super cute! ♥
Wrap Up
And we’re now done with our My Little Pony article! ♥ omg, that was a lot of work, honestly. But I’m glad I got to learn about them and how to draw them, because it was so much fun. I much prefer drawing ponies compared to horses, lol.
I hope you liked it and could discover some things by reading the article. 🙂
If you want more tutorials covering other things:
- How to Draw Chibi Boys: 30+ Easy Tutorials and Drawing Ideas
- 29 Cute and Easy Chibi Girl Drawing Ideas (a lot of tutorials here as well)
- 33 Simple Flower Drawing Ideas (many tutorials)