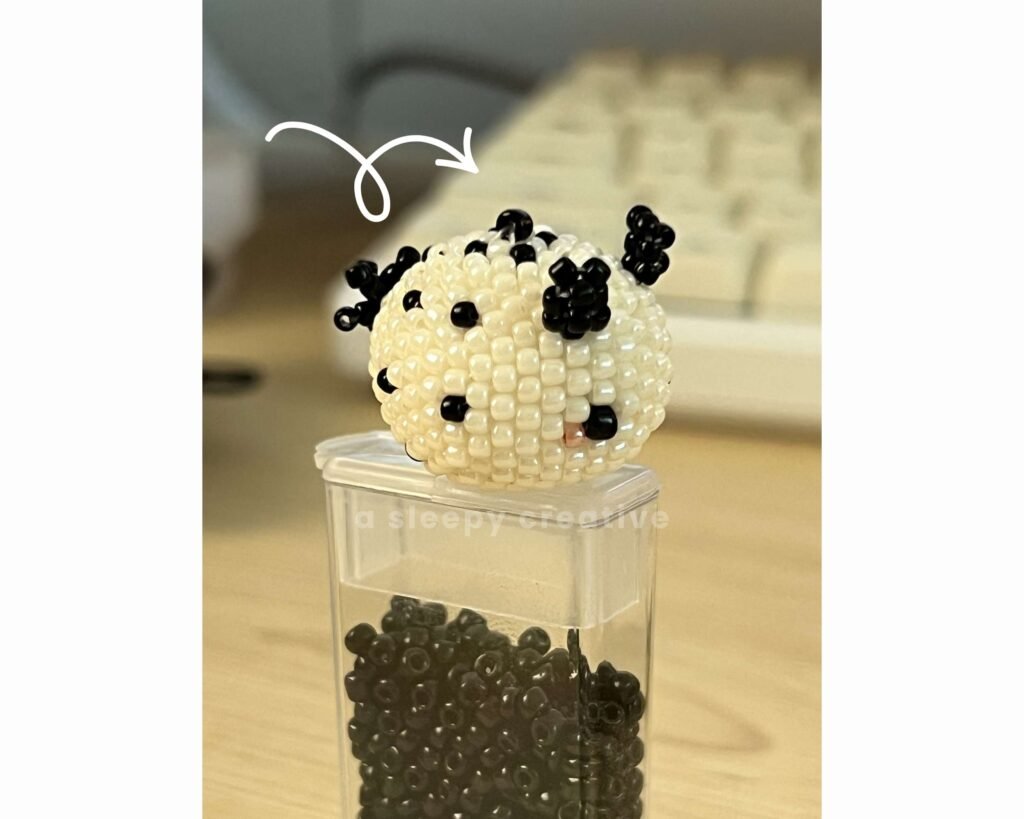
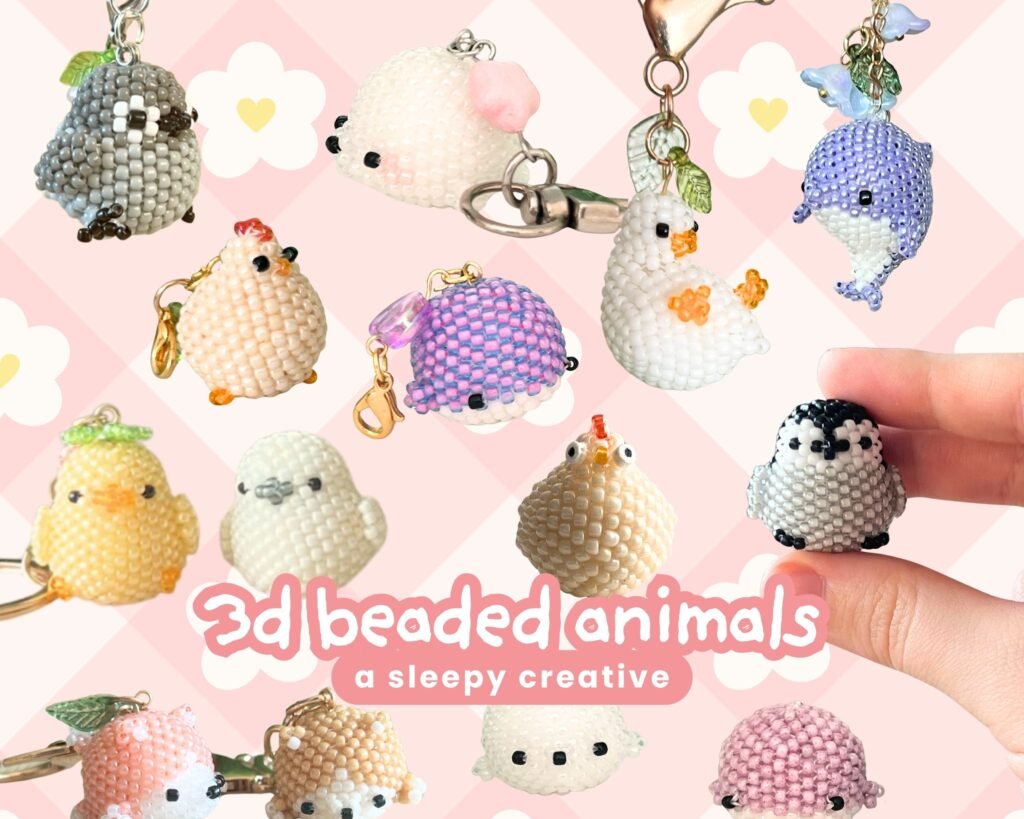
Hello hello! I’m finally back with another article about beading. And if you’ve been following my journey, you probably know I’ve been beading for a while now. And I’m now mostly making cute animals:
And I receive a lot of questions about them. The questions are mostly about my process and tutorials – which I completely understand.
All my detailed tutorials are available on my shop, where you can find very simple as well as slightly more complex patterns (but all of them can be followed even if you’re a beginner!)
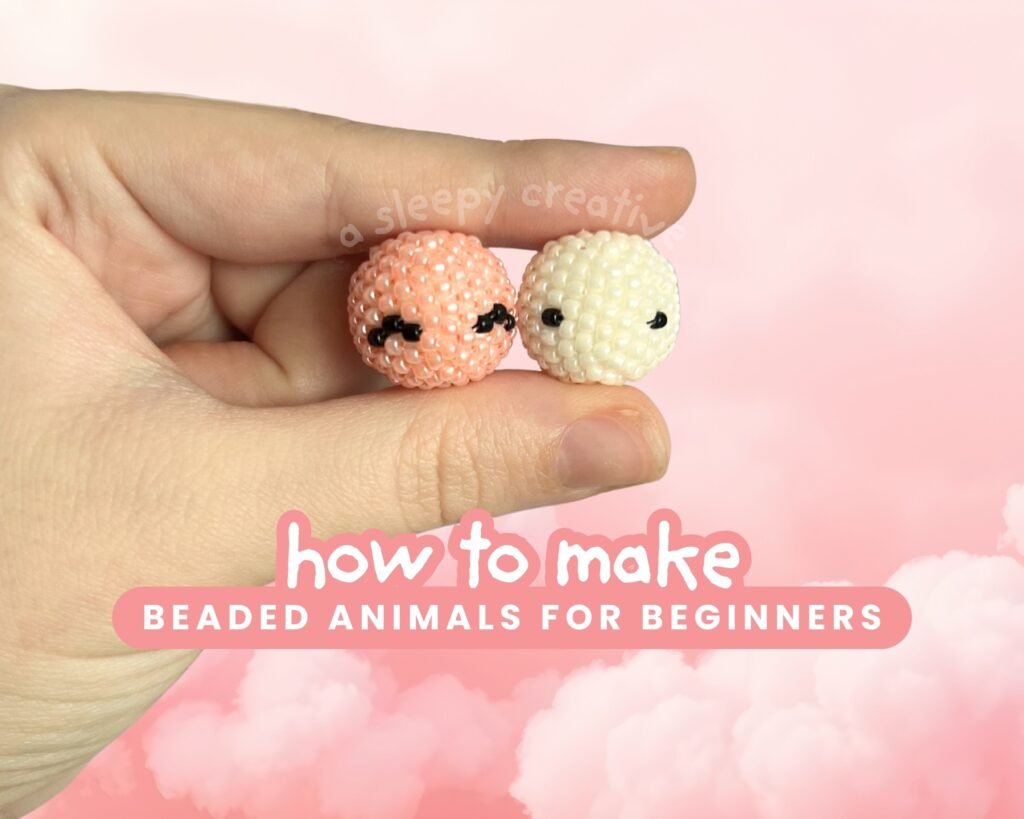
In this article, I’ll cover some basics of what you need to start making beaded animals, as well as showing you one simple example. I already have a few articles about the matter:
- How to Peyote Stitch: A Visual Guide (Even-Count, Odd-Count, and Advanced Techniques) – the basics of peyote stitch, the technique at the base of everything. You should learn – or at least understand – peyote stitch before starting with 3D peyote stitch patterns
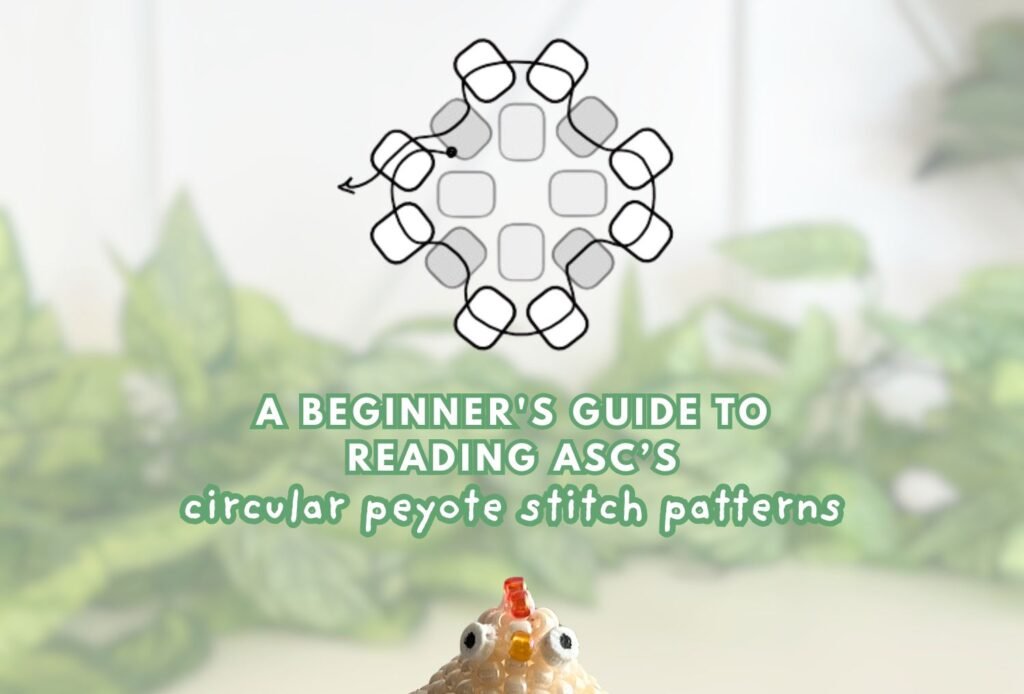
- How to Read Circular Peyote Stitch Patterns – a beginner’s guide explaining how to read the patterns, the difference between patterns, etc. It’s super useful if you’re familiar with regular peyote stitch but haven’t learned circular peyote stitch yet.
- How to Make a 3D Beaded Ball for Beginners – covers a full tutorial on how to make a simple beaded sphere in peyote stitch. We’ll cover most of it in this article as well, with updated diagrams.
I also have a couple of articles helping you to make more intricate designs, which you can find in the beading category of the blog if you’re interested.
Anyway, let’s dive into the topic of today: beaded animals!
3D Beaded Animals: The Basics
As I wrote previously and as I say in a lot of my articles and on Instagram, most of the 3D beaded animals start with a simple shape: the sphere. If you know how to make a sphere and have imagination or a clear picture of what you want to achieve, you’re already on the right track!
Most animals can be decomposed in an assemblage of more or less spherical shapes. At first, I suggest you stylize the shape and make them rounder – it looks cute, and it’s easier to make! Of course, you’ll need a little bit of imagination for the most part.
If you need more information about the material, and more basic things, I suggest you go back to this article: How to Read Circular Peyote Stitch Patterns where I cover everything about the material needed and more.
Make sure you really go through this article carefully as everything is explained with a lot of details. In this article, I won’t go through the details as much.
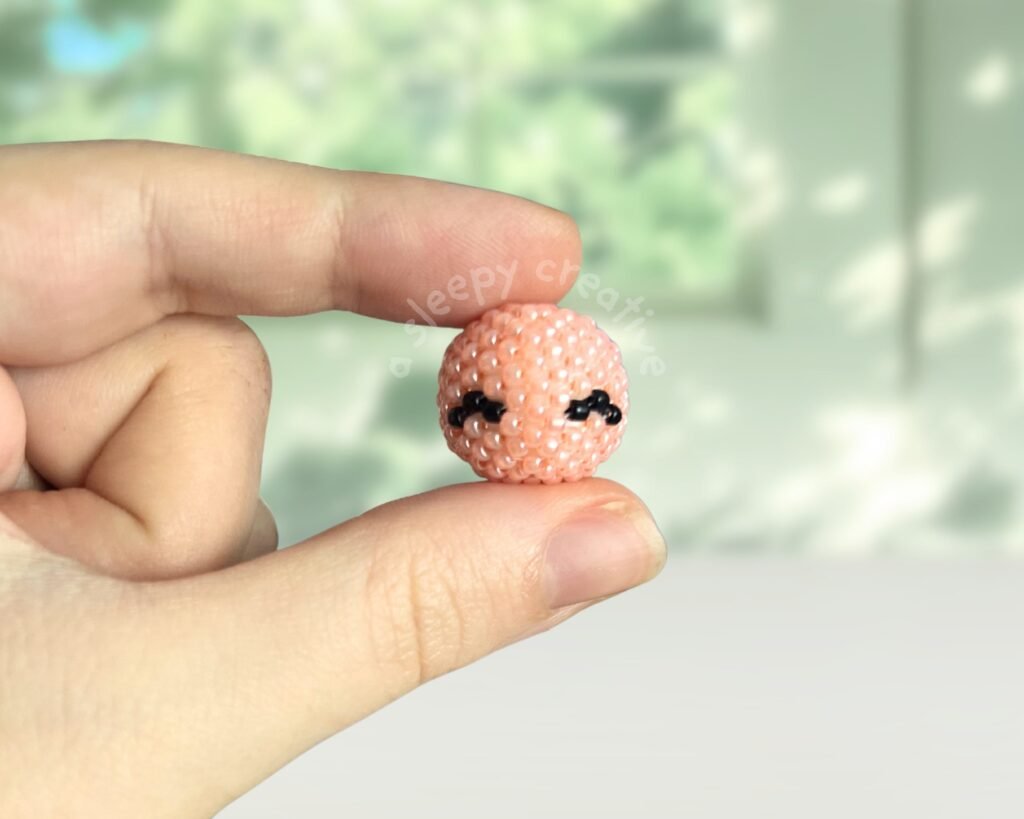
How to Make a Beaded Sphere
So!! Since making a sphere is the foundation of making simple beaded animals – let’s learn to make a mini ball. Once you understand the concept, you’ll be able to adjust it and make it fit your needs and vision.
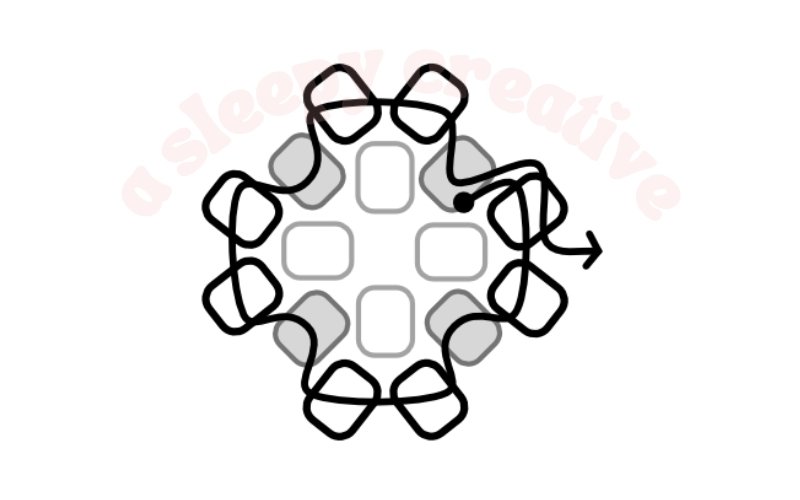
ROW 1
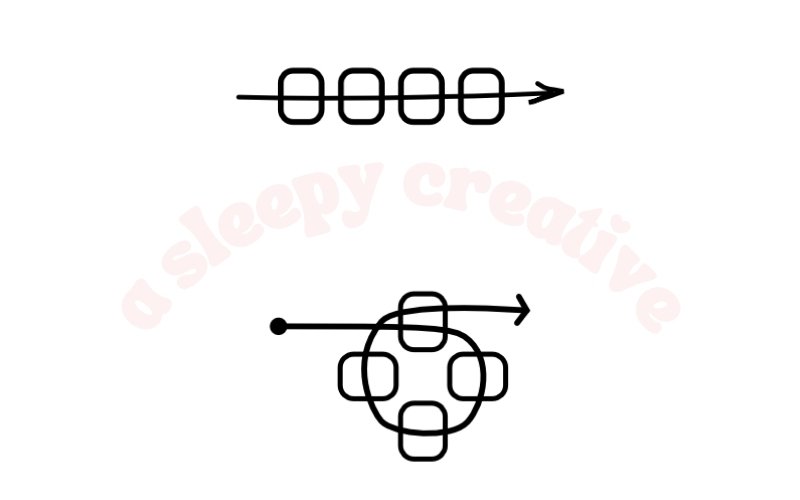
Option 1 – String 4 beads onto your thread. Leave a short tail. Bring both ends of the thread together. Tie a knot – you can choose between a regular double knot or a surgeon’s knot. Cut the short tail you left once you’re done with the knot.
Option 2 – Alternatively, you can leave a tail instead of tying a knot by looping in the first bead of the row. (as shown on the diagram above) Doing it this way will allow you to make a keychain more easily, especially if you’re not using polystyrene as your stuffing.
ROW 2
Add one bead between each bead of row 1. Once you’ve added all 4 beads, pass through the first bead of this row again.
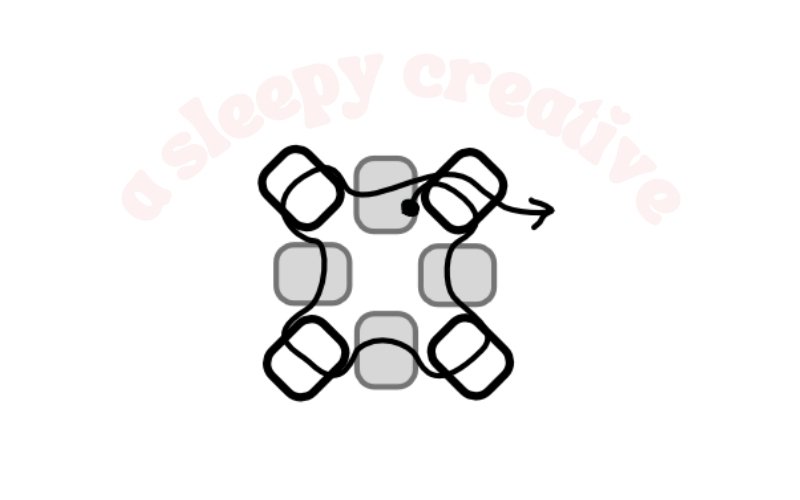
ROW 3
First increase – add two beads between each bead of the previous row.
As said previously, if you’re not familiar with the concept of increase, check out this article: How to Read Circular Peyote Stitch Patterns!
ROW 4
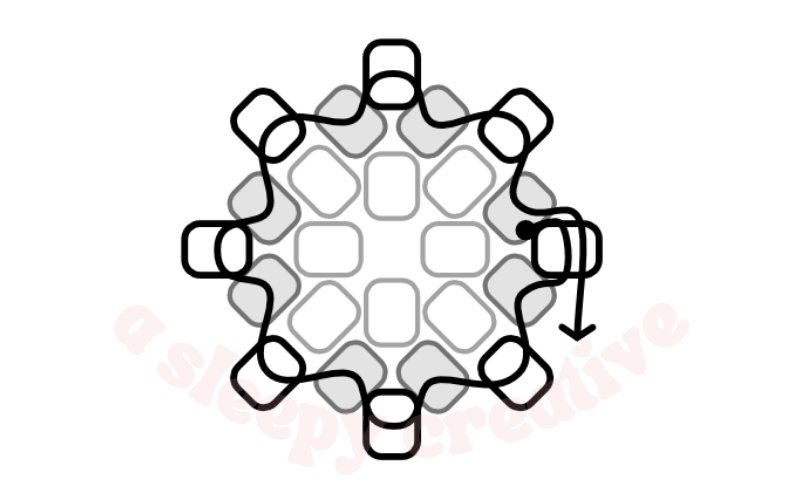
+1 bead between each bead of the last row
ROW 5
+1 bead between each bead of the last row
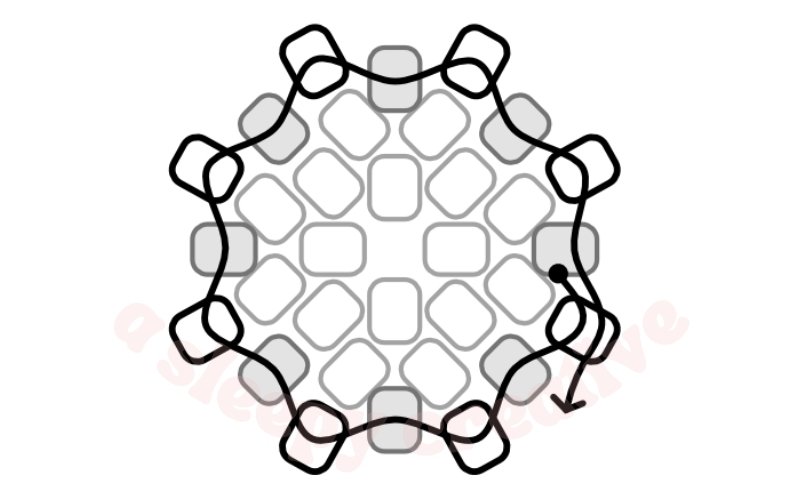
In general, for the best results and a nice curve, you’ll spread the increases. Usually, you’ll bead two regular rows in between increases or decreases.
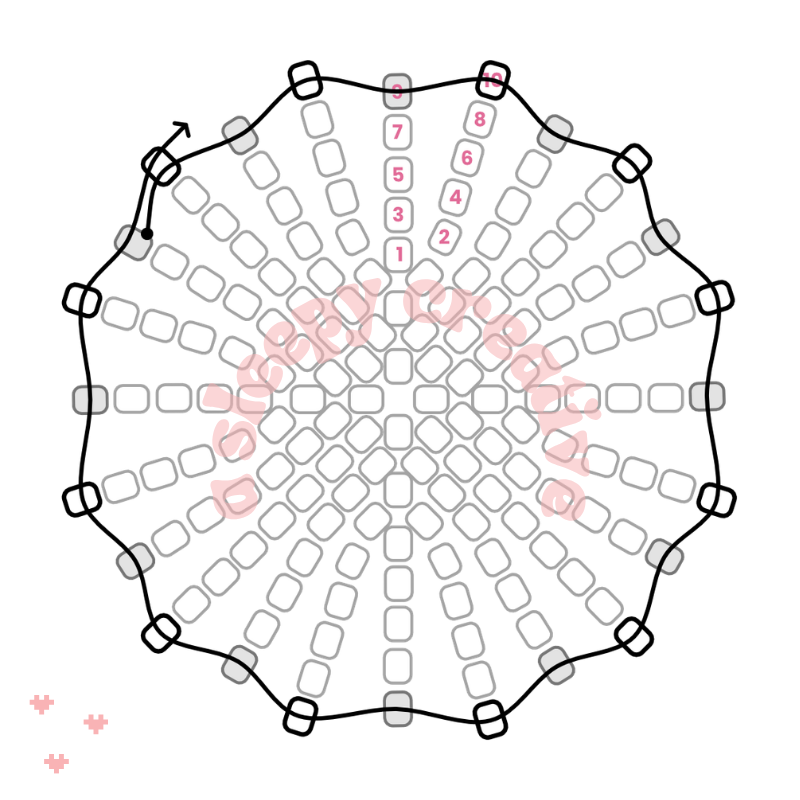
ROW 6
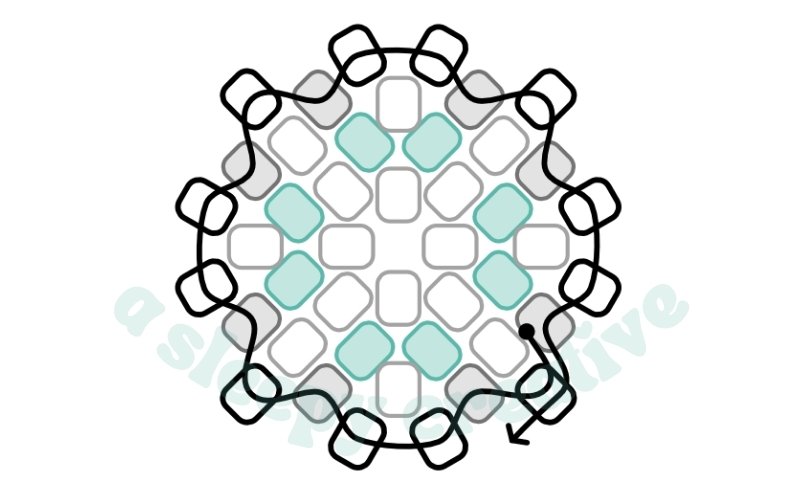
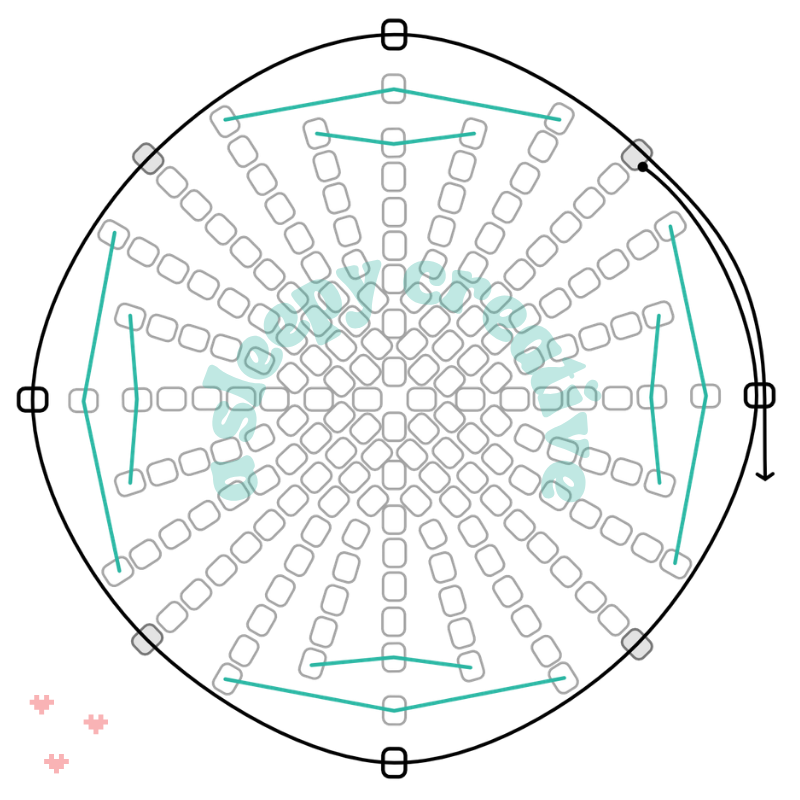
Second increase – above the last increases. Alternate +1 and +2. I highlighted the previous increases in teal on the diagram.
It’ll bring the bead count to 12 – and this will be the widest part of our ball (I told you, we’re making a mini ball!). You can increase it to 16, 20 or more if you want to make a larger ball, of course.
ROW 7
+1 bead between each bead of the last row
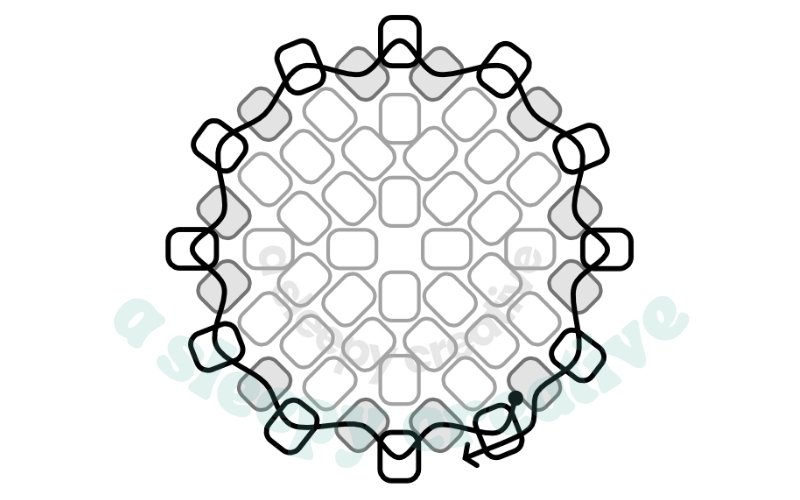
Continue with regular circular peyote stitch rows until you reach ten rows after the increase.
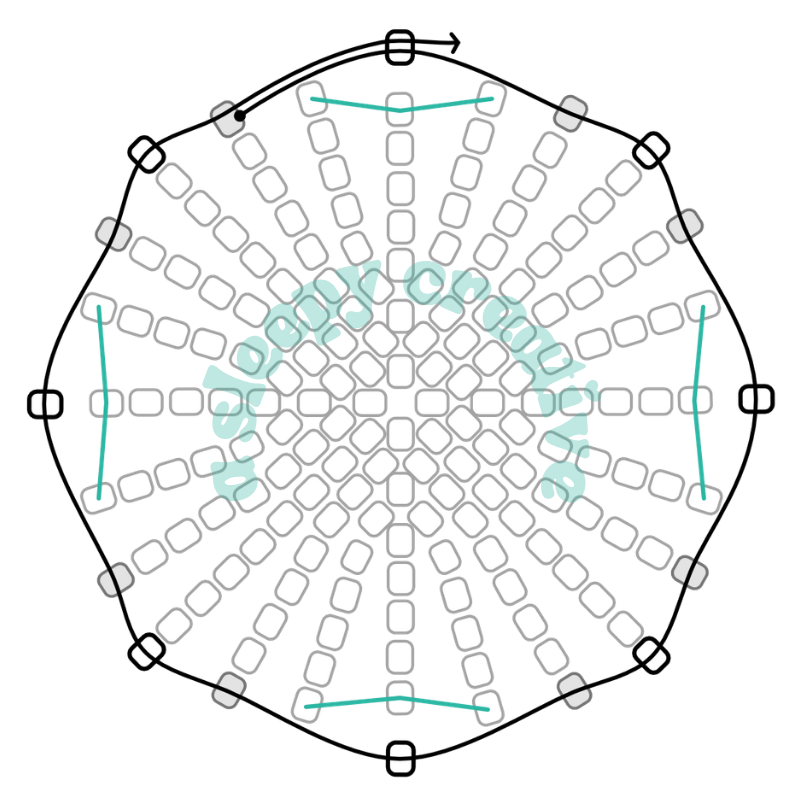
ROW 16
On this diagram above, you can see the 10 extra regular rows added. You can add more or less depending on your stuffing, but it might look less like a sphere if you do.
The numbers indicate the rows from the last increase we’ve made, showing a total of 10:) (active row included)
If you want to add eyes to your sphere, I suggest you add them to the row 6 here! You just have to replace two beads by black beads. 🙂
Now, we’re gonna start decreasing!
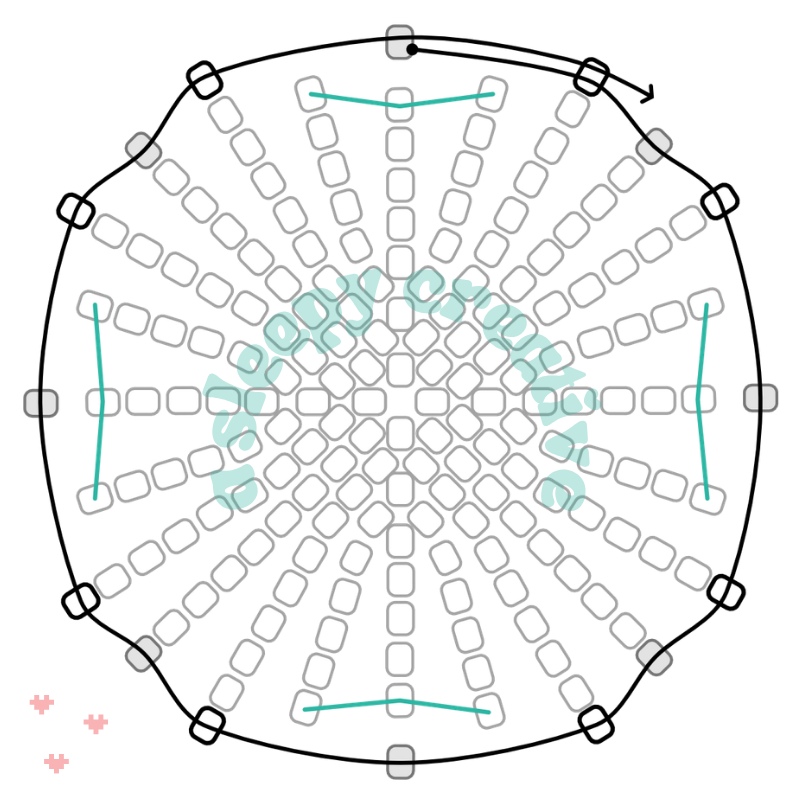
ROW 17
Time for the first decrease. If you’re not familar with decreases, check out this article: How to Read Circular Peyote Stitch Patterns where I explain everything about decreases as well and how to make them and understand the diagrams around decreases
We go from 12 beads to 8 beads again, since we decrease at 4 different spots. (1 0 1 1 0 1 1 0 1 1 0 1)
I usually stack my increases and decreases, but it’s not mandatory at all, it depends on the number of rows you add between the last increase and the first decrease.
ROW 18
Now this one is not an easy row either. Even though this is just a regular row where you add one bead in between each bead of the last row, you should be careful and make sure you’re going through the right beads.
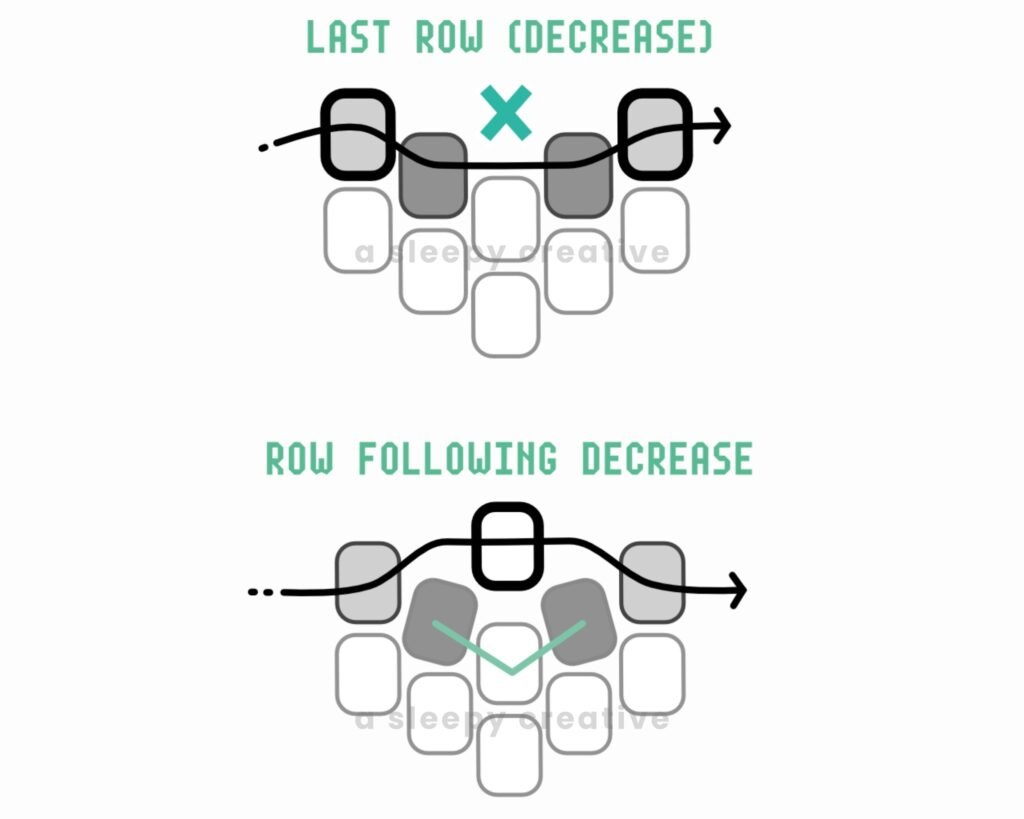
We end up with the same amount of beads in the row (8)
ROW 19
Same regular row, 1 bead in between each bead of the last row!
As always, make sure you identify the beads of the last row correctly, beucase it can be tricky for the rows following the decreases.
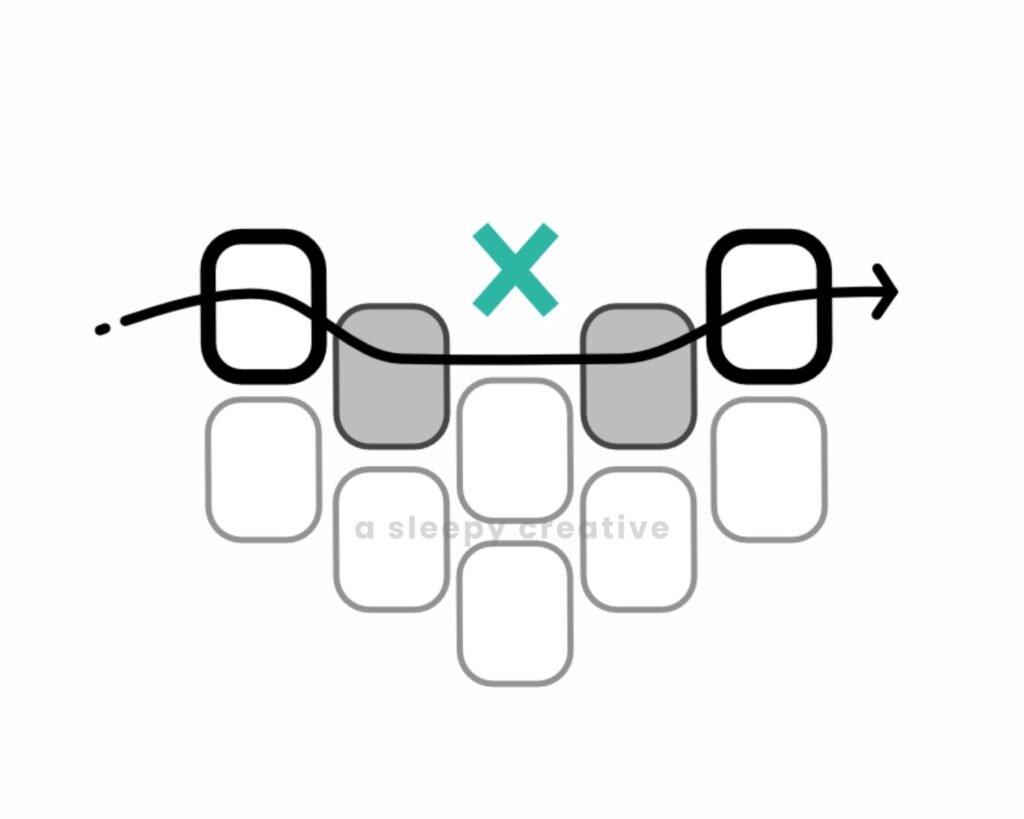
ROW 20
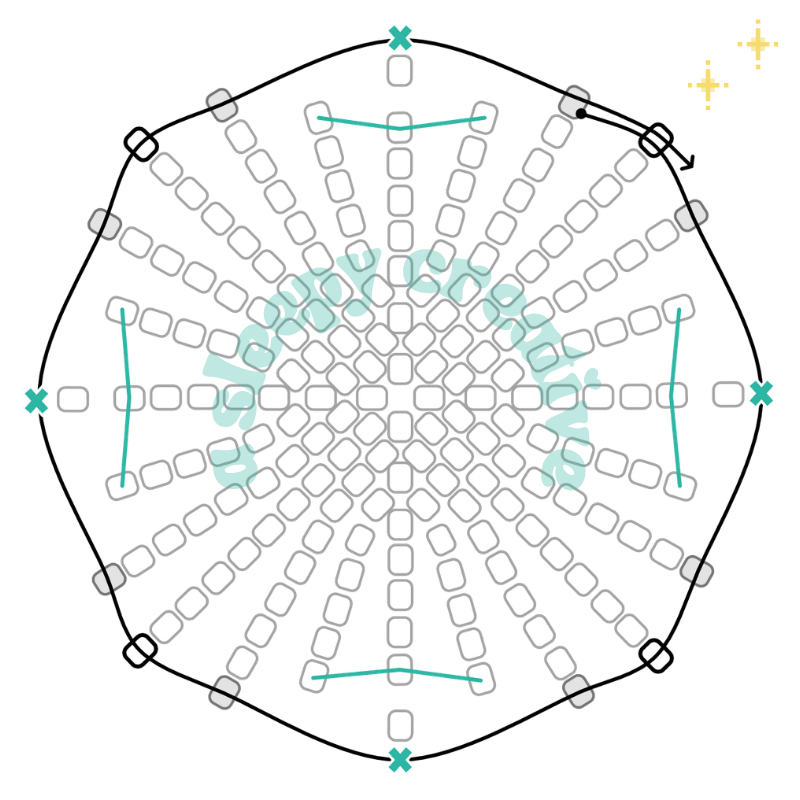
Second – and last – decrease. ( 1 0 1 0 1 0 1 0 )
We go from 8 beads to 4 beads. At this point, you’re almost done!
ROW 21
And the last row where we put one bead between each bead of the last row as usual.
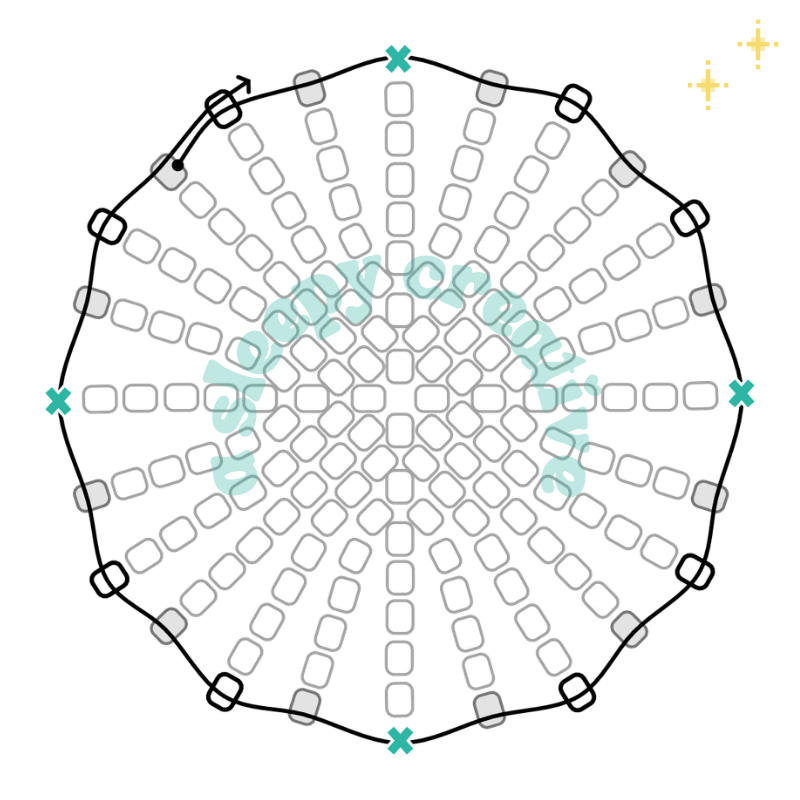
With the diagram up here and if you’re used to the diagrams I make, you can identify easily the shape we’re working on, all the rows, increases and decreases. Usually, if I share a pattern in one image, it would contain more information such as colored increases, row numbers, etc.
And if you’ve followed the diagrams correctly, you should end up with a small ball!
How to Make the Features
Now that you know how to make the base of an animal (because you can already do a lot with spheres, such as animal faces, stylized bodies, etc), let’s talk a little about the features.
Adding features to a ball will truly change everything – you can go from a ball to a bunny face, for example. My Miffy pattern is a perfect example of that.
And to be honest, at this point, you’ll mostly be limited by your own imagination rather than anything else. If you can’t simplify the images in your head and imagine a simplified version of the animal you want to make, you’ll be stuck very quickly as a beginner. Of course, you can also copy work you see online – but again, it’s not very nice to the original creator, and it’s also very limited.
To make features, I mostly use a mix of brick stitch/peyote stitch as well as my own stitching method to come up to the method I want. It might come to a lot of trial and error before reaching the result you want.
I’ll show you a couple of examples for you to visualize.
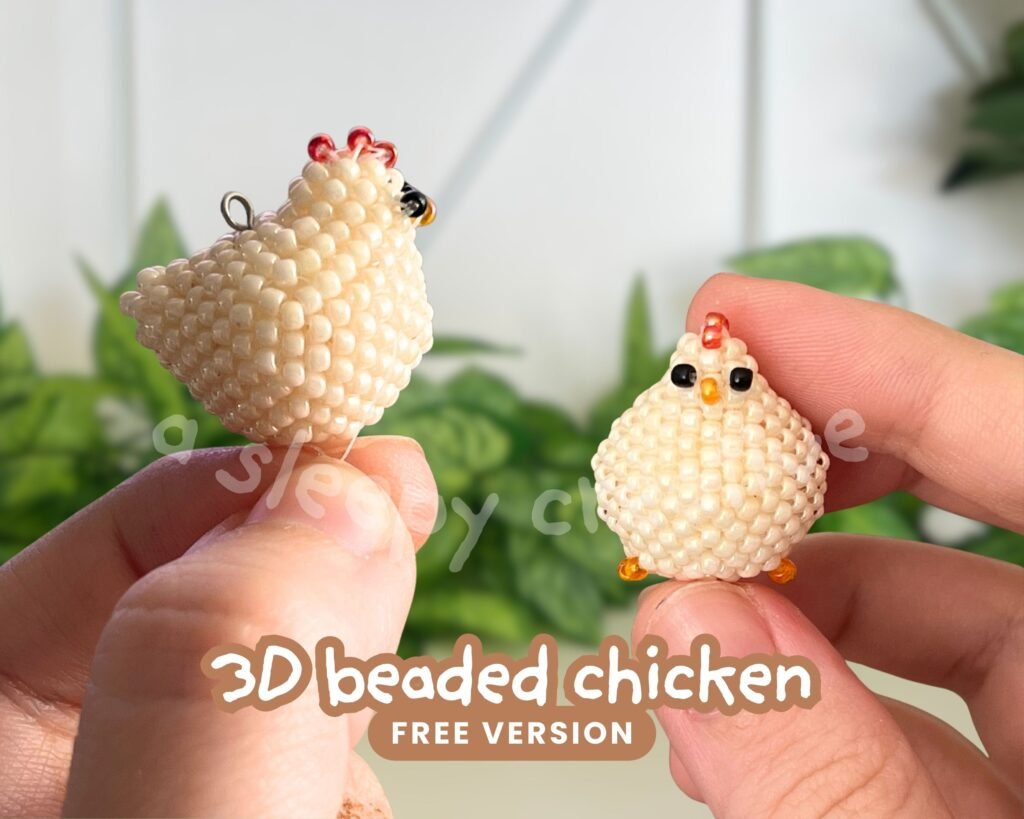
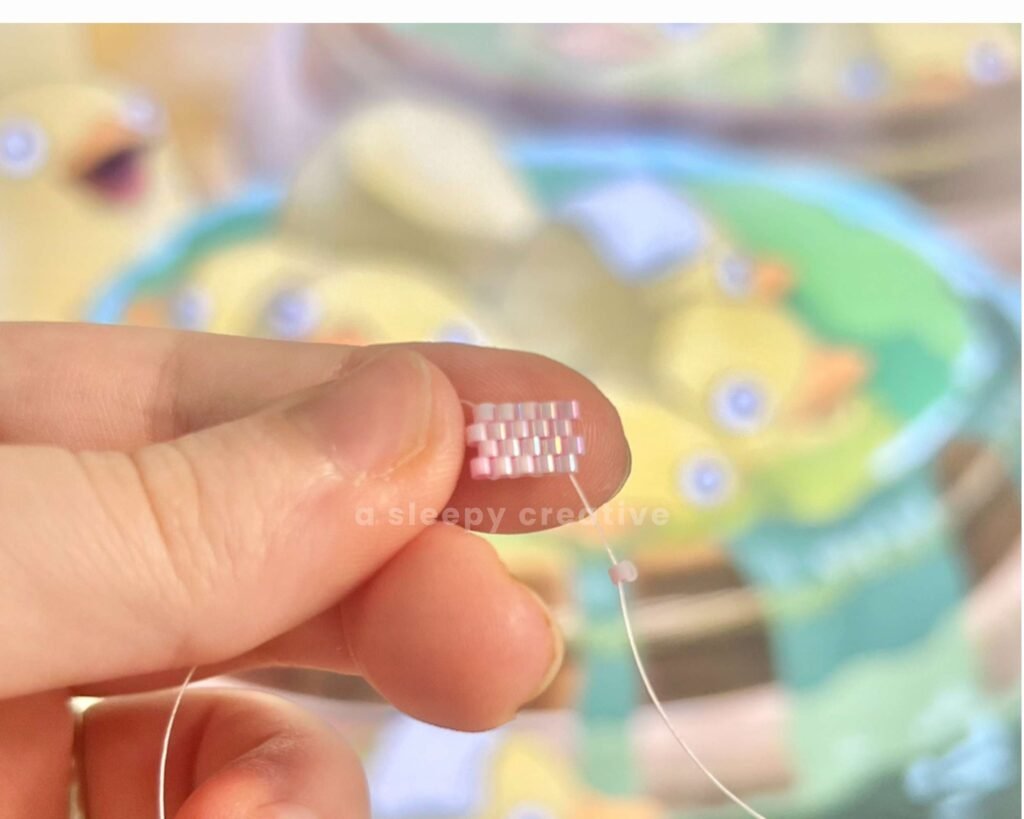
Example 1: Bird Wings
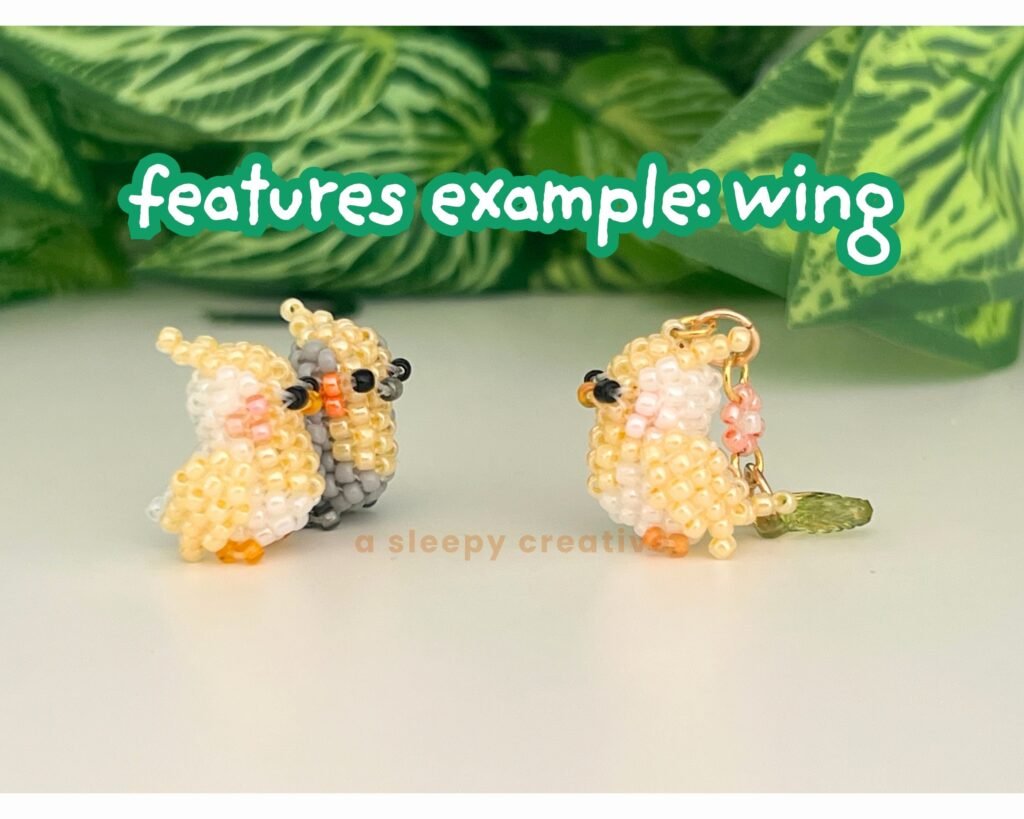
This example showcases the wing feature! Adding wings to your main shape is much easier than it seems. You can either sew it right away on the ball by positioning your needle at the right spot and bead from there, or take a new thread to make it (easier for beginners)
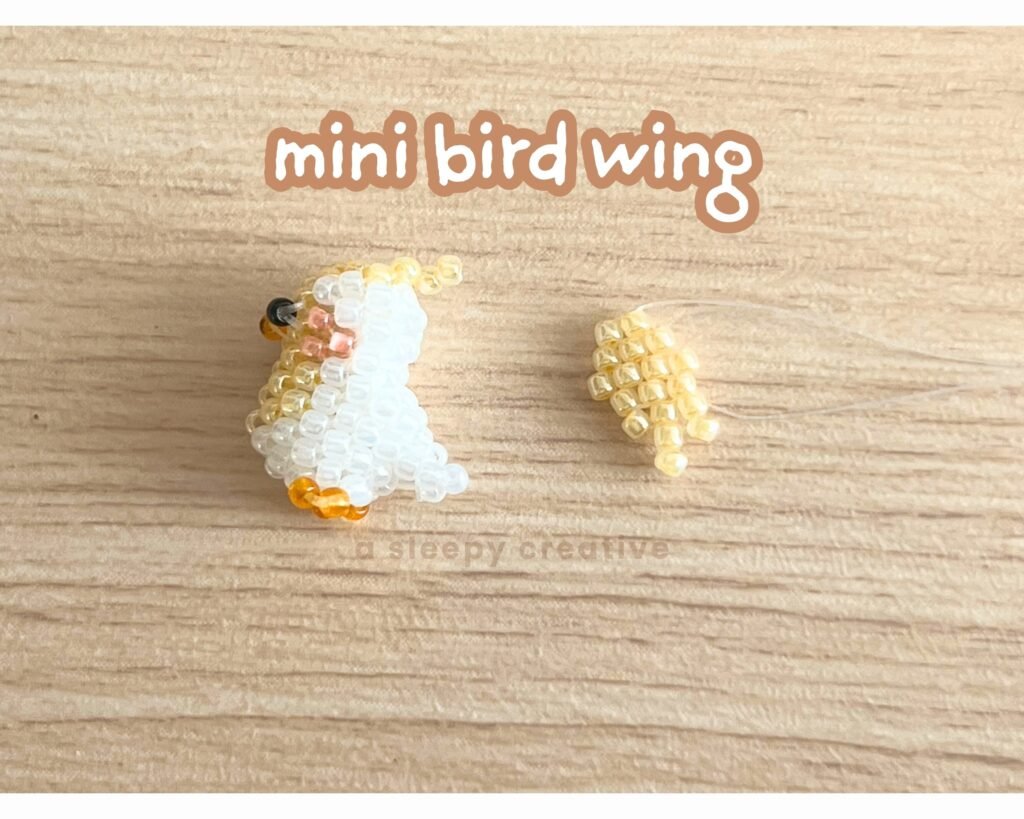
As you can see on this picture, the wing was made with brick stitch and then sewn on the body. If you don’t know the basics of brick stitch, check my article here: How to Brick Stitch: A Visual Guide (Foundations, Basics, Increases, Decreases)
Example 2: Bunny Ears
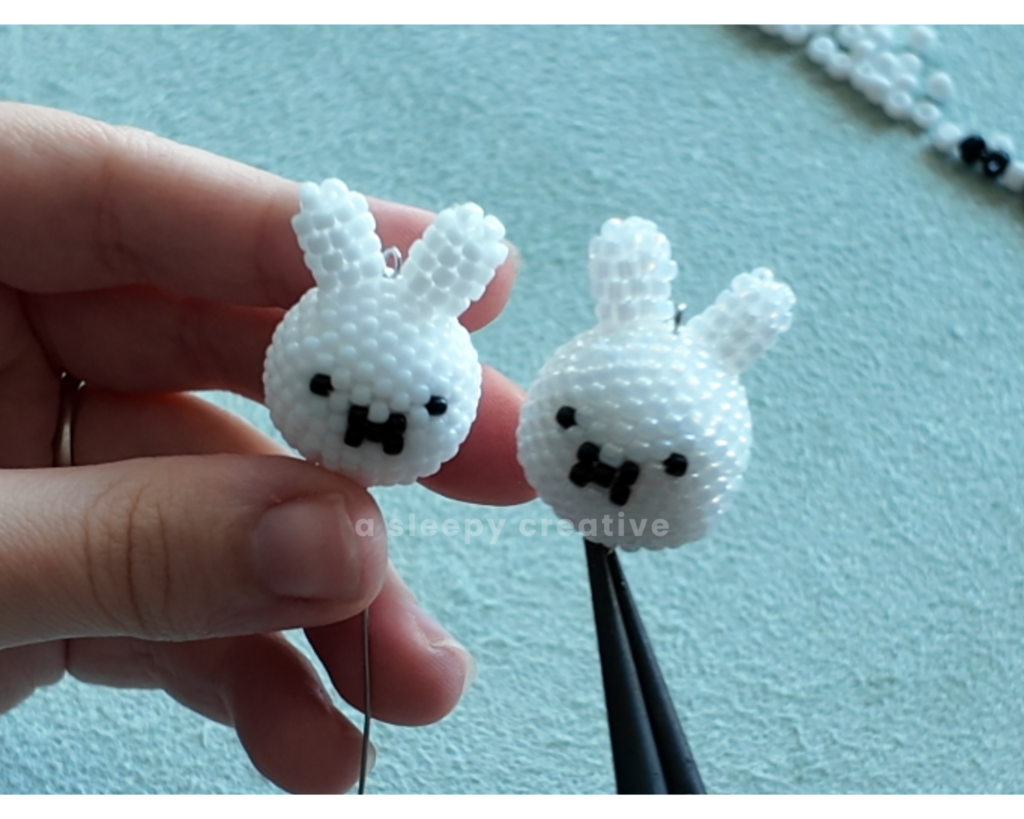
The ears of Miffy are also a good example as I said previously. They’re actually just peyote(or brick) stitch rectangles zipped up on each other to form a tube.
So you can make a shape similar to this one:
Then zipping it up (joining the left and the right side together), which will make a tube. Then, you add a couple of beads, and you get one ear!

You just have to sew it securely to your sphere and you have a bunny face.
You can also check out more example on my whale tutorial (article), where I explained about simple fins and tail to make a whale.
My paid tutorial for the whale has a much more sturdy version of the same features – which I work on for all my paid content. For me, the most important is for the charm to be sturdy and withstand time.
Making a Keychain
When you’re done making your beaded animal, you might want to turn it into a keychain.
You’ll need some material: jump rings, larger bead (or at least a bead with a larger hole) and extra charms, keychain clasp, and some pliers – you can also technically to it with your fingers only, but it’ll be much more difficult (opening and closing the jumpring, etc.)
You need to secure a bigger bead on the top of your animal, then insert the jump ring in it before decorating your charm!
If you choose this method, make sure to pass multiple times through the large beads and several beads from your animal, so the attachment is secure without putting too much strain on a the beads of the animal.